LangGraph: LangGraph Workflow Patterns Through Practical Case Studies: Part 2
Project && Guide
Table of Contents
- Introduction
- 1. Prompt Chaining Pattern
- 2. Routing Pattern
- 3. Parallelization Pattern
- 4. Orchestrator-Worker Pattern
- 5. Reflection Pattern
- Summary of LangGraph Workflow Patterns
- Resources
Introduction
LangGraph is useful when an AI application needs more than a single prompt-response interaction. Instead of calling an LLM once, LangGraph lets us design workflows made of nodes, shared state, conditional logic, loops, parallel branches, and structured outputs. Each workflow pattern solves a different type of problem.
This document explains several LangGraph workflow patterns using practical project examples.
1. Prompt Chaining Pattern
Case Study: Job Application Assistant
The Prompt Chaining pattern is used when a task must be completed in multiple ordered steps, with each step depending on the output of the previous one. In this project, we implement a Job Application Assistant that helps users create a personalized cover letter from a job description using two chained LLM prompts.
Workflow Steps
- Generate Resume Summary:
- The LLM reads the job description and creates a tailored resume summary, highlighting the key qualifications and experience from the perspective of a strong applicant.
- Generate Cover Letter:
- The LLM uses the generated resume summary and the original job description to write a professional, personalized cover letter.
This approach ensures the final cover letter is focused and relevant, as the model first extracts the most important applicant strengths before composing the letter.
State Design
A shared state dictionary tracks the input, intermediate, and final outputs:
| State Field | Purpose |
|---|---|
job_description |
Stores the job posting or role description provided by the user |
resume_summary |
Stores the applicant summary generated from the job description |
cover_letter |
Stores the final personalized cover letter |
Workflow Diagram
1
2
3
4
5
6
7
User Job Description
  ↓
Generate Tailored Resume Summary
  ↓
Generate Cover Letter
  ↓
Final Cover Letter
Key Code Blocks
State Definition
1
2
3
4
class ChainState(TypedDict):
    job_description: str
    resume_summary: str
    cover_letter: str
Resume Summary Generation Node
1
2
3
4
5
6
7
8
9
def generate_resume_summary(state: ChainState) -> ChainState:
    prompt = f"""
You're a resume assistant. Read the following job description and summarize the key qualifications and experience the ideal candidate should have, phrased as if from the perspective of a strong applicant's resume summary.

Job Description:
{state['job_description']}
"""
    response = llm.invoke(prompt)
    return {**state, "resume_summary": response.content}
Cover Letter Generation Node
1
2
3
4
5
6
7
8
9
10
11
12
def generate_cover_letter(state: ChainState) -> ChainState:
    prompt = f"""
You're a cover letter writing assistant. Using the resume summary below, write a professional and personalized cover letter for the following job.

Resume Summary:
{state['resume_summary']}

Job Description:
{state['job_description']}
"""
    response = llm.invoke(prompt)
    return {**state, "cover_letter": response.content}
Workflow Construction
1
2
3
4
5
6
7
workflow = StateGraph(ChainState)
workflow.add_node("generate_resume_summary", generate_resume_summary)
workflow.add_node("generate_cover_letter", generate_cover_letter)
workflow.set_entry_point("generate_resume_summary")
workflow.add_edge("generate_resume_summary", "generate_cover_letter")
workflow.set_finish_point("generate_cover_letter")
app = workflow.compile()
Example Usage
1
2
3
4
5
6
7
if __name__ == "__main__":
    input_state = {
        "job_description": "We are looking for a data scientist with experience in machine learning, NLP, and Python. Prior work with large datasets and experience deploying models into production is required."
    }
    result = app.invoke(input_state)
    print(result['resume_summary'])
    print(result['cover_letter'])
Workflow Output
This project demonstrates how prompt chaining can be used to build more robust, multi-step LLM workflows for real-world applications like job application assistance.
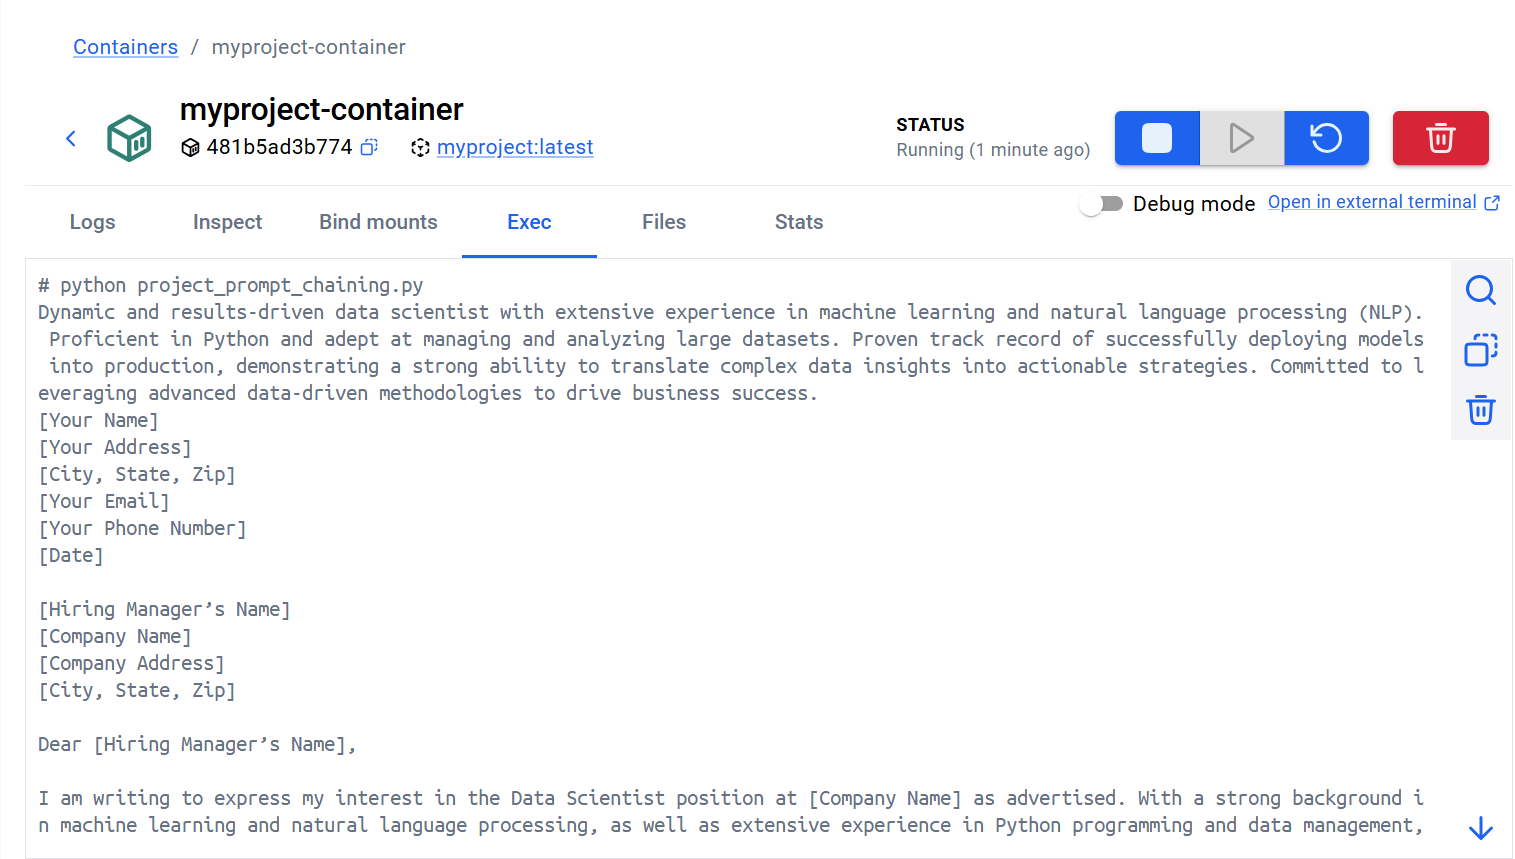
This image shows the results of running the project in a Docker terminal, demonstrating the workflow output as seen during execution.
2. Routing Pattern
Case Study: Smart Text Task Router
The Routing pattern is used when an application must choose between different processing paths based on user intent. In this project, we implement a Smart Text Task Router that decides whether the user wants to summarize or translate text, and routes the request to the appropriate specialized node.
Example Use Cases
| User Request | Route |
|---|---|
| “Summarize this article about AI.” | Summarization node |
| “Translate this paragraph to French.” | Translation node |
Instead of building one large node to handle everything, we use a router node to classify the request and send it to the correct specialized node.
Workflow Diagram
1
2
3
4
5
6
7
User Input
   ↓
Router Node
   ↓
Summarizer OR Translator
   ↓
Final Output
This pattern is powerful for assistants that support many skills, such as summarization, translation, rewriting, classification, or extraction.
Key Code Blocks
State Definition
1
2
3
4
class RouterState(TypedDict):
    user_input: str
    task_type: str
    output: str
Router Node (Intent Classification)
1
2
3
4
5
6
7
8
9
10
11
def router_node(state: RouterState) -> RouterState:
    routing_prompt = f"""
    You are an AI task classifier.
    Decide whether the user wants to:
    - "summarize" a passage
    - or "translate" text into French
    Respond with just one word: 'summarize' or 'translate'.
    User Input: "{state['user_input']}"
    """
    response = llm_router.invoke(routing_prompt)
    return {**state, "task_type": response.tool_calls[0]['args']['role']}
Summarization Node
1
2
3
4
def summarize_node(state: RouterState) -> RouterState:
    prompt = f"Please summarize the following passage:\n\n{state['user_input']}"
    response = llm.invoke(prompt)
    return {**state, "task_type": "summarize", "output": response.content}
Translation Node
1
2
3
4
def translate_node(state: RouterState) -> RouterState:
    prompt = f"Translate the following text to French:\n\n{state['user_input']}"
    response = llm.invoke(prompt)
    return {**state, "task_type": "translate", "output": response.content}
Workflow Construction
1
2
3
4
5
6
7
8
9
workflow = StateGraph(RouterState)
workflow.add_node("router", router_node)
workflow.add_node("summarize", summarize_node)
workflow.add_node("translate", translate_node)
workflow.set_entry_point("router")
workflow.add_conditional_edges("router", router, {"summarize": "summarize", "translate": "translate"})
workflow.set_finish_point("summarize")
workflow.set_finish_point("translate")
app = workflow.compile()
Example Usage
1
2
3
4
5
if __name__ == "__main__":
    input_text = {"user_input": "Can you translate this sentence: I love programming?"}
    result = app.invoke(input_text)
    print(result['output'])
    print(result['task_type'])
Workflow Output
This project demonstrates how the routing pattern can be used to build flexible, multi-skill LLM assistants that intelligently direct user requests to the right processing logic.
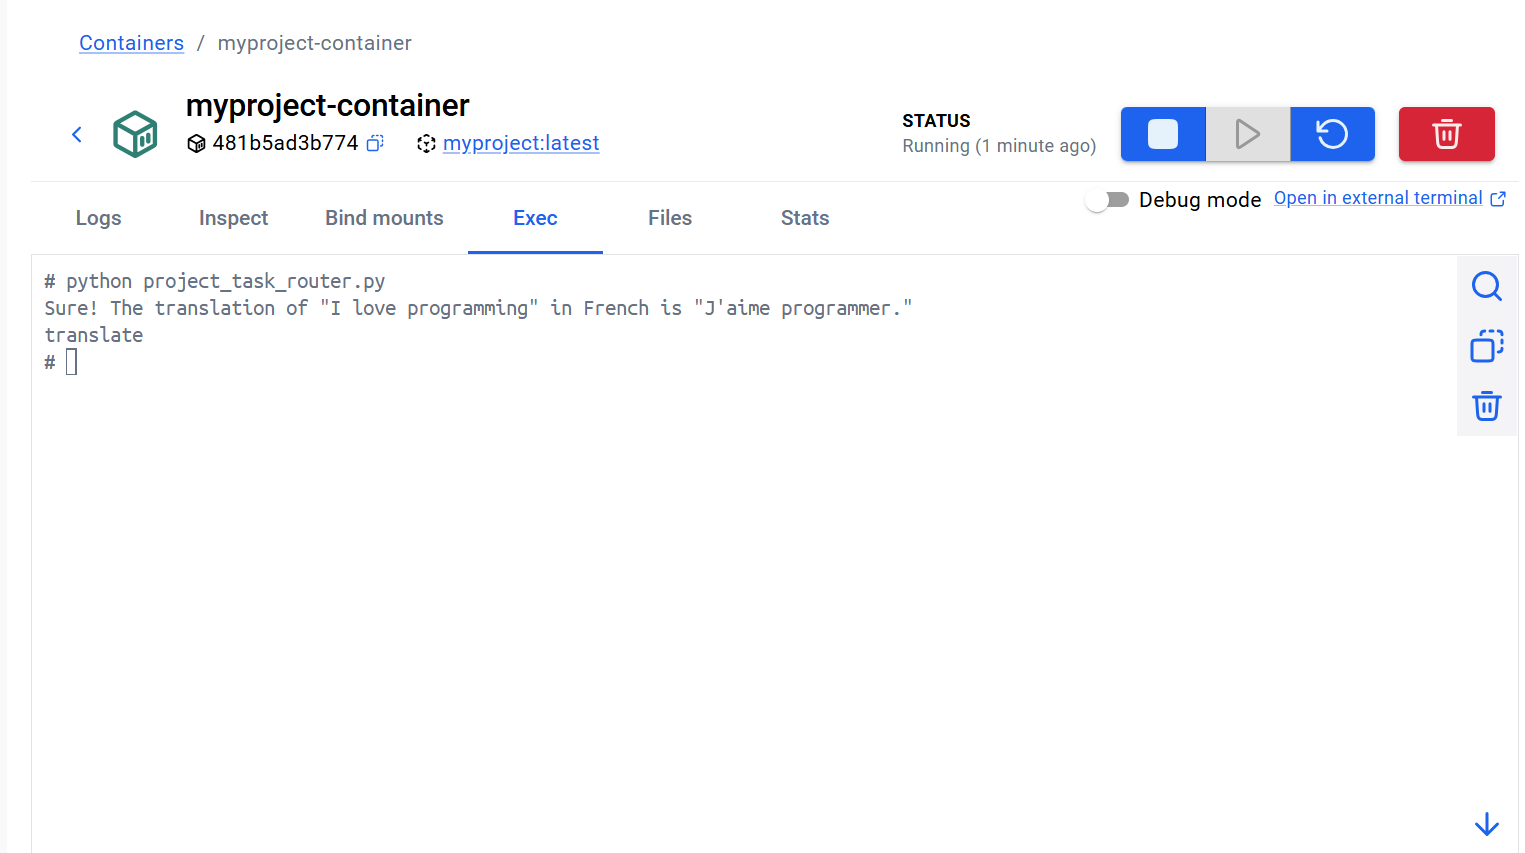
This image shows the results of running the project in a Docker terminal, demonstrating the workflow output as seen during execution.
3. Parallelization Pattern
Case Study: Multilingual Translation Assistant
The Parallelization pattern is ideal for workflows where multiple independent tasks can be executed simultaneously. In this project, we implement a Multilingual Translation Assistant that takes an English sentence and translates it into French, Spanish, and Japanese in parallel.
This approach is efficient because each translation is independent—no translation depends on the result of another.
State Design
| State Field | Purpose |
|---|---|
text |
Original English sentence |
french |
French translation |
spanish |
Spanish translation |
japanese |
Japanese translation |
combined_output |
Final combined multilingual result |
Workflow Diagram
1
2
3
4
5
6
7
8
9
English Text
   ↓
 ┌──────────────┬──────────────┬──────────────┐
 ↓              ↓              ↓
French Node   Spanish Node   Japanese Node
 ↓              ↓              ↓
 └──────────────┴──────────────┴──────────────┘
     ↓
    Combine Results
Key Code Blocks
State Definition
1
2
3
4
5
6
7
# Define the state for the workflow
class State(TypedDict):
    text: str
    french: str
    spanish: str
    japanese: str
    combined_output: str
Translation Nodes
1
2
3
4
5
6
7
8
9
10
11
12
13
14
15
# Each translation node runs independently
@langgraph.node
def translate_french(state: State) -> State:
    state["french"] = llm.invoke(f"Translate to French: {state['text']}")
    return state

@langgraph.node
def translate_spanish(state: State) -> State:
    state["spanish"] = llm.invoke(f"Translate to Spanish: {state['text']}")
    return state

@langgraph.node
def translate_japanese(state: State) -> State:
    state["japanese"] = llm.invoke(f"Translate to Japanese: {state['text']}")
    return state
Combine Results Node
1
2
3
4
5
6
7
8
@langgraph.node
def combine_results(state: State) -> State:
    state["combined_output"] = (
        f"French: {state['french']}\n"
        f"Spanish: {state['spanish']}\n"
        f"Japanese: {state['japanese']}"
    )
    return state
Graph Construction
1
2
3
4
5
6
7
8
9
10
11
# Build the parallel workflow graph
workflow = (
    langgraph.Graph(State)
    .add_node("french", translate_french)
    .add_node("spanish", translate_spanish)
    .add_node("japanese", translate_japanese)
    .add_node("combine", combine_results)
    .add_edge("__start__", ["french", "spanish", "japanese"])
    .add_edge(["french", "spanish", "japanese"], "combine")
    .add_edge("combine", "__end__")
)
Why Use This Pattern?
- Efficiency: All translations are performed at the same time, reducing total processing time.
- Simplicity: Each translation node is independent and easy to maintain.
- Scalability: More languages can be added by simply adding more parallel nodes.
Workflow Output
The Parallelization pattern is powerful for tasks where multiple independent operations can be executed simultaneously. In this project, it enables fast, scalable, and maintainable multilingual translation.
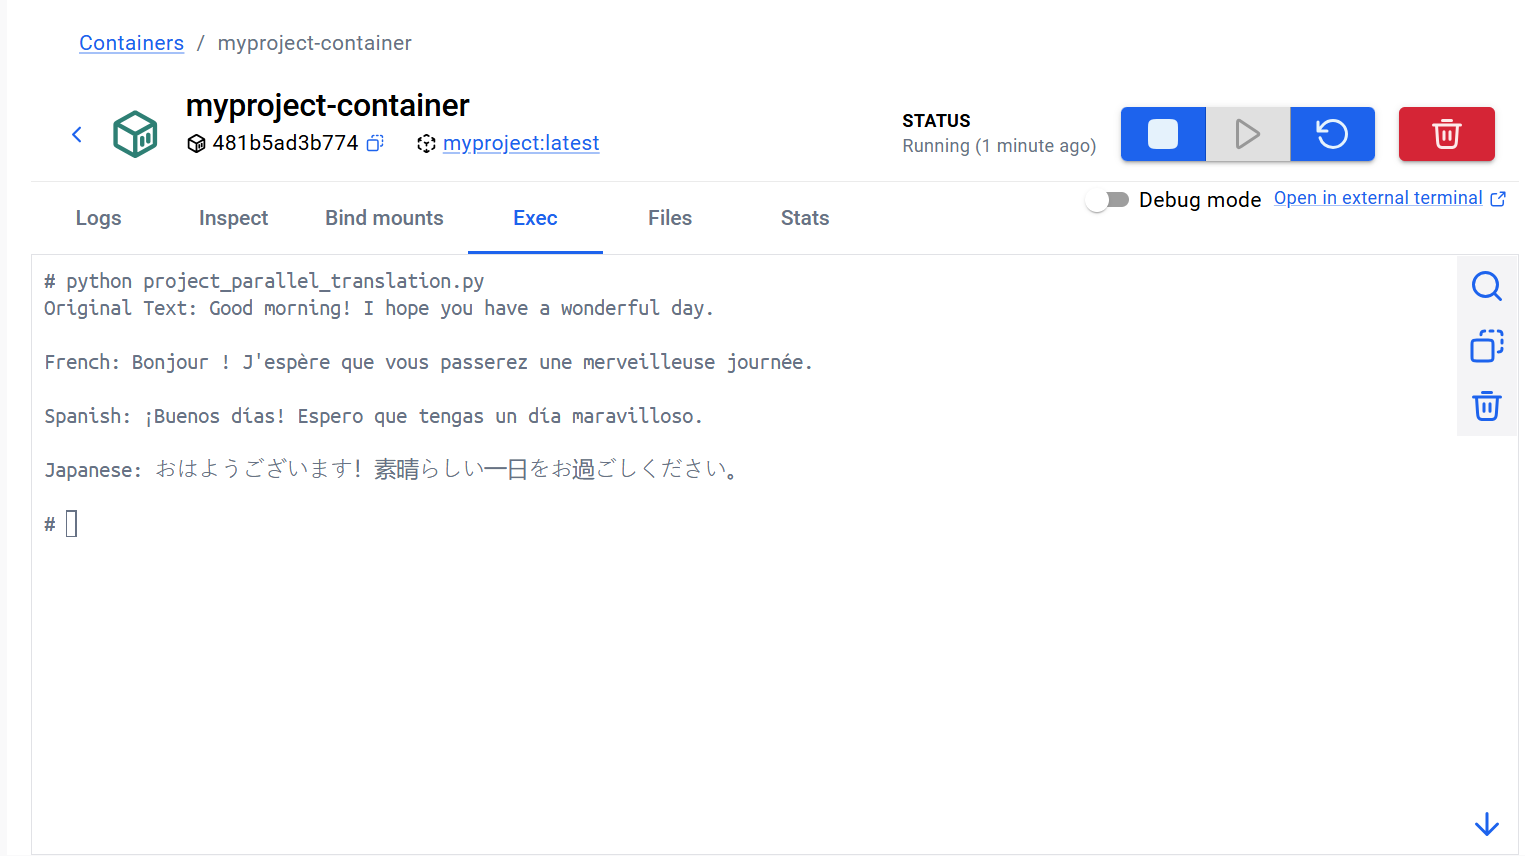
This image shows the results of running the project in a Docker terminal, demonstrating the workflow output as seen during execution.
4. Orchestrator-Worker Pattern
Case Study: Event Catering Menu Planner
The Orchestrator-Worker pattern is used when a central planner breaks a large task into smaller subtasks, then multiple workers complete those subtasks in parallel. In this project, we implement an Event Catering Menu Planner that takes a list of meals or dishes for a large event, structures them, and generates a detailed guide for each dish using specialized worker nodes.
Workflow Steps
- Orchestrator Node:
- Reads the user’s meal request and breaks it into structured dish sections.
- Produces structured outputs so worker nodes receive clean and predictable inputs.
- Worker Nodes (Chef Workers):
- Each worker receives one dish and generates a detailed guide for it (ingredients, preparation steps, notes, etc.).
- Each worker only focuses on one dish, keeping the workflow modular and scalable.
- Synthesizer Node:
- Collects all worker outputs and combines them into one final catering guide.
Structured Output
Each dish is represented as a structured object:
| Field | Example |
|---|---|
| Dish name | Margherita Pizza |
| Ingredients | Tomato, mozzarella, basil, flour |
| Cuisine | Italian |
A Dish schema is used for each dish, and a Dishes class stores the full list.
State Design
| State Field | Purpose |
|---|---|
meals |
Initial user input |
sections |
Structured list of dishes created by the orchestrator |
completed_menu |
Worker-generated guide for each dish |
final_meal_guide |
Final combined catering guide |
Main Nodes
Orchestrator Node
The orchestrator is responsible for high-level planning. It reads the user input and breaks it into structured dish sections.
Example input:
1
Steak and eggs, tacos, and chili
Orchestrator output:
1
A list of structured dish objects that worker nodes can process independently.
Worker Nodes
Each worker receives one dish and generates a detailed guide for it, such as:
- Ingredients
- Preparation steps
- Cooking notes
- Serving suggestions
- Dietary considerations
Synthesizer Node
The synthesizer collects all worker outputs and combines them into one final meal planning guide.
Workflow Diagram
1
2
3
4
5
6
7
8
9
10
11
User Meal Request
  ↓
Orchestrator Node
  ↓
Structured Dish List
  ↓
Parallel Chef Workers
  ↓
Synthesizer Node
  ↓
Final Meal Planning Guide
Key Code Blocks
State Definition
1
2
3
4
5
class State(TypedDict):
    meals: str
    sections: List[Dish]
    completed_menu: Annotated[List[str], operator.add]
    final_meal_guide: str
Orchestrator Node
1
2
3
def orchestrator(state: State):
    dish_descriptions = planner_pipe.invoke({"meals": state["meals"]})
    return {"sections": dish_descriptions.sections}
Worker Assignment
1
2
def assign_workers(state: State):
    return [Send("chef_worker", {"section": s}) for s in state["sections"]]
Chef Worker Node
1
2
3
4
5
6
7
def chef_worker(state: WorkerState):
    meal_plan = chef_pipe.invoke({
        "name": state["section"].name,
        "location": state["section"].location,
        "ingredients": state["section"].ingredients
    })
    return {"completed_menu": [meal_plan.content]}
Synthesizer Node
1
2
3
4
def synthesizer(state: State):
    completed_sections = state["completed_menu"]
    completed_menu = "\n\n---\n\n".join(completed_sections)
    return {"final_meal_guide": completed_menu}
Workflow Construction
1
2
3
4
5
6
7
8
9
orchestrator_worker_builder = StateGraph(State)
orchestrator_worker_builder.add_node("orchestrator", orchestrator)
orchestrator_worker_builder.add_node("chef_worker", chef_worker)
orchestrator_worker_builder.add_node("synthesizer", synthesizer)
orchestrator_worker_builder.add_conditional_edges("orchestrator", assign_workers, ["chef_worker"])
orchestrator_worker_builder.add_edge(START, "orchestrator")
orchestrator_worker_builder.add_edge("chef_worker", "synthesizer")
orchestrator_worker_builder.add_edge("synthesizer", END)
orchestrator_worker = orchestrator_worker_builder.compile()
Example Usage
1
2
3
if __name__ == "__main__":
    state = orchestrator_worker.invoke({"meals": "Steak and eggs, tacos, and chili"})
    pprint(state["final_meal_guide"][:2000])
Workflow Output
This project demonstrates how the orchestrator-worker pattern can be used to build scalable, modular LLM workflows for real-world applications like event catering and meal planning.
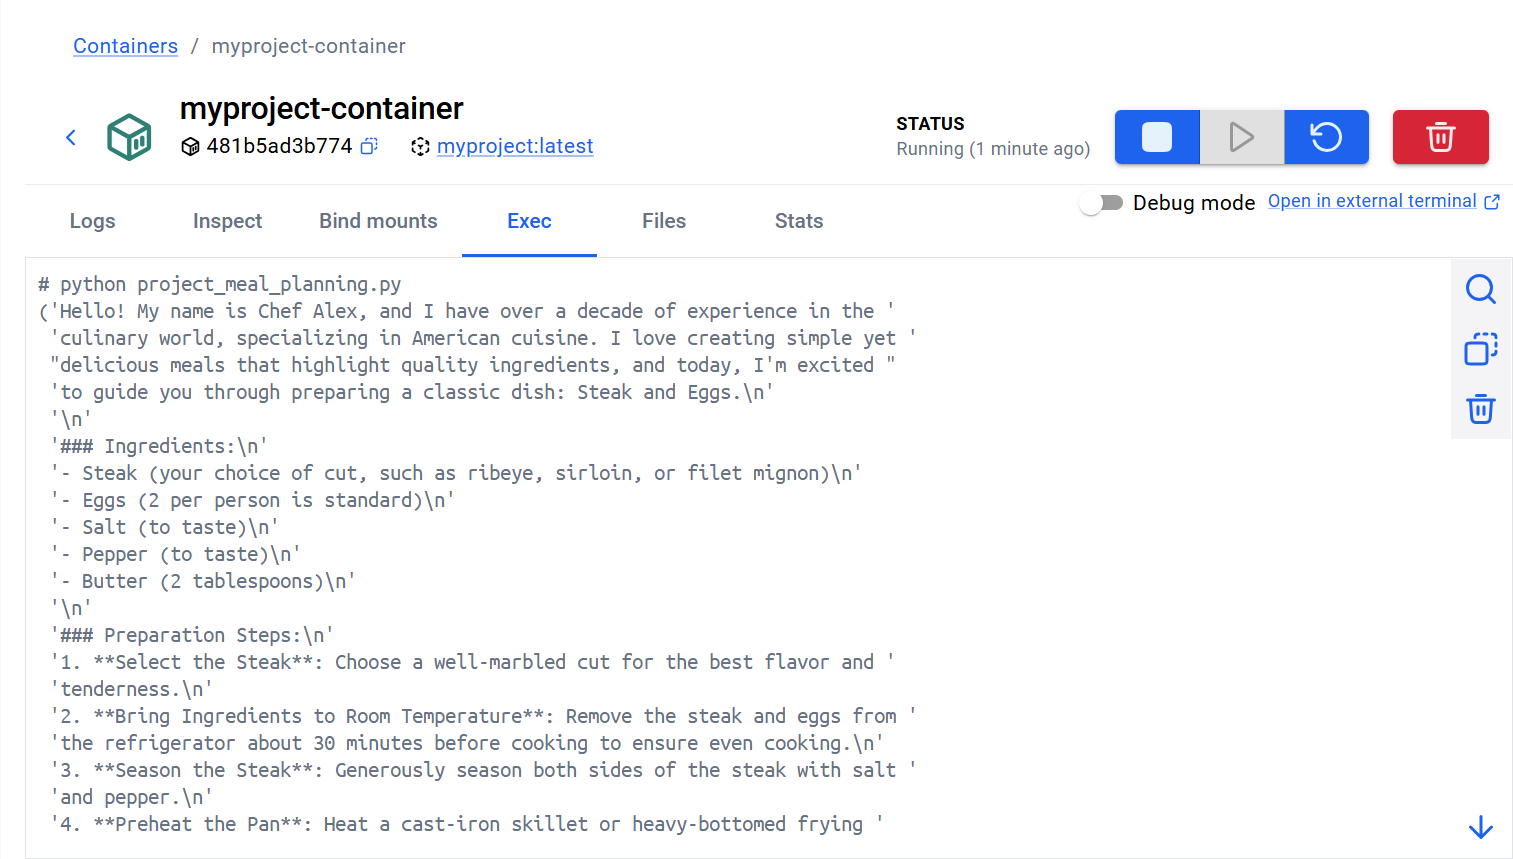
This image shows the results of running the project in a Docker terminal, demonstrating the workflow output as seen during execution.
5. Reflection Pattern
Case Study: Investment Plan Evaluator and Optimizer
The Reflection pattern is used when a system must generate an answer, evaluate it, improve it, and repeat this process until a target condition is met. In this project, we implement an Investment Plan Evaluator and Optimizer that iteratively generates, evaluates, and refines investment plans until the plan matches the investor’s target risk grade or a maximum number of iterations is reached.
Core Workflow Loop
1
2
3
4
5
6
7
Generate Plan
     ↓
Evaluate Plan
     ↓
Accept OR Revise
     ↓
Repeat if needed
State Design
| State Field | Purpose |
|---|---|
investor_profile |
User’s financial background and goals |
target_grade |
Desired risk category |
investment_plan |
Generated investment strategy |
grade |
Evaluator’s assigned risk grade |
feedback |
Evaluator’s critique |
n |
Number of reflection iterations |
Workflow Flow
1
2
3
4
5
6
7
8
9
10
11
Investor Profile
      ↓
Determine Target Grade
      ↓
Generate Investment Plan
      ↓
Evaluate Plan
      ↓
Conditional Router
      ↓
Accept OR Revise
Key Nodes and Logic
Target Grade Determination Node
Determines the target risk grade based on the investor profile.
1
2
3
4
5
def determine_target_grade(state: State):
    response = grade_pipe.invoke({
        "investor_profile": state["investor_profile"]
    })
    return {"target_grade": response.content.lower()}
Investment Plan Generator Node
Generates an investment plan. Uses a bold (Cathie Wood style) plan for the first iteration, and a more adaptive (Ray Dalio style) plan for revisions.
1
2
3
4
5
6
7
8
9
10
11
12
def investment_plan_generator(state: State) -> dict:
    if state.get("feedback"):
        response = ray_dalio_pipe.invoke({
            "investor_profile": state["investor_profile"],
            "grade": state["grade"],
            "feedback": state["feedback"]
        })
    else:
        response = cathie_wood_pipe.invoke({
            "investor_profile": state["investor_profile"]
        })
    return {"investment_plan": response.content}
Evaluator Node
Evaluates the investment plan, assigns a risk grade, and provides feedback.
1
2
3
4
5
6
7
8
def evaluate_plan(state: State):
    current_count = state.get('n', 0) + 1
    evaluation_result = buffett_evaluator_pipe.invoke({
        "investment_plan": state["investment_plan"],
        "investor_profile": state["investor_profile"],
        "target_grade": state["target_grade"]
    })
    return {"grade": evaluation_result.grade, "feedback": evaluation_result.feedback, "n": current_count}
Routing Node
Determines whether to accept the plan, revise it, or stop after too many attempts.
1
2
3
4
5
6
7
8
9
10
def route_investment(state: State, iteration_limit: int = 5):
    current_grade = state.get("grade", "MISSING")
    target_grade = state.get("target_grade", "MISSING")
    match = current_grade == target_grade
    if match:
        return "Accepted"
    elif state['n'] > iteration_limit:
        return "Accepted"
    else:
        return "Rejected + Feedback"
Workflow Construction
The workflow iterates between plan generation and evaluation until the plan is accepted or the iteration limit is reached.
1
2
3
4
5
6
7
8
9
10
11
12
13
14
15
16
optimizer_builder = StateGraph(State)
optimizer_builder.add_node("determine_target_grade", determine_target_grade)
optimizer_builder.add_node("investment_plan_generator", investment_plan_generator)
optimizer_builder.add_node("evaluate_plan", evaluate_plan)
optimizer_builder.add_edge(START, "determine_target_grade")
optimizer_builder.add_edge("determine_target_grade", "investment_plan_generator")
optimizer_builder.add_edge("investment_plan_generator", "evaluate_plan")
optimizer_builder.add_conditional_edges(
    "evaluate_plan",
    lambda state: route_investment(state),
    {
        "Accepted": END,
        "Rejected + Feedback": "investment_plan_generator",
    },
)
optimizer_workflow = optimizer_builder.compile()
Example Usage
1
2
3
4
5
6
7
8
9
10
11
12
13
14
15
16
17
18
if __name__ == "__main__":
    dummy_state: State = {
        "investment_plan": "",
        "investor_profile": "Age: 29\nSalary: $110,000\nAssets: $40,000\nGoal: Achieve financial independence by age 45\nRisk tolerance: High",
        "target_grade": "",
        "feedback": "",
        "grade": "",
        "n": 0
    }
    # Step-by-step demonstration
    dummy_state.update(determine_target_grade(dummy_state))
    dummy_state.update(investment_plan_generator(dummy_state))
    dummy_state.update(evaluate_plan(dummy_state))
    print(f"Grade: {dummy_state['grade']}")
    print(f"Feedback: {dummy_state['feedback']}")
    # Or run the full workflow in one call
    result = optimizer_workflow.invoke(dummy_state)
    print(result)
Why Use This Pattern?
- Quality Improvement: The system iteratively improves its output based on feedback.
- Transparency: Each step and revision is tracked in the state.
- Flexibility: The workflow can be adapted for other domains (writing, code review, research, etc.).
Workflow Output
The Reflection pattern enables iterative, feedback-driven improvement. In this project, it ensures that investment plans are not only generated but also evaluated and refined until they meet the investor’s needs and risk profile.
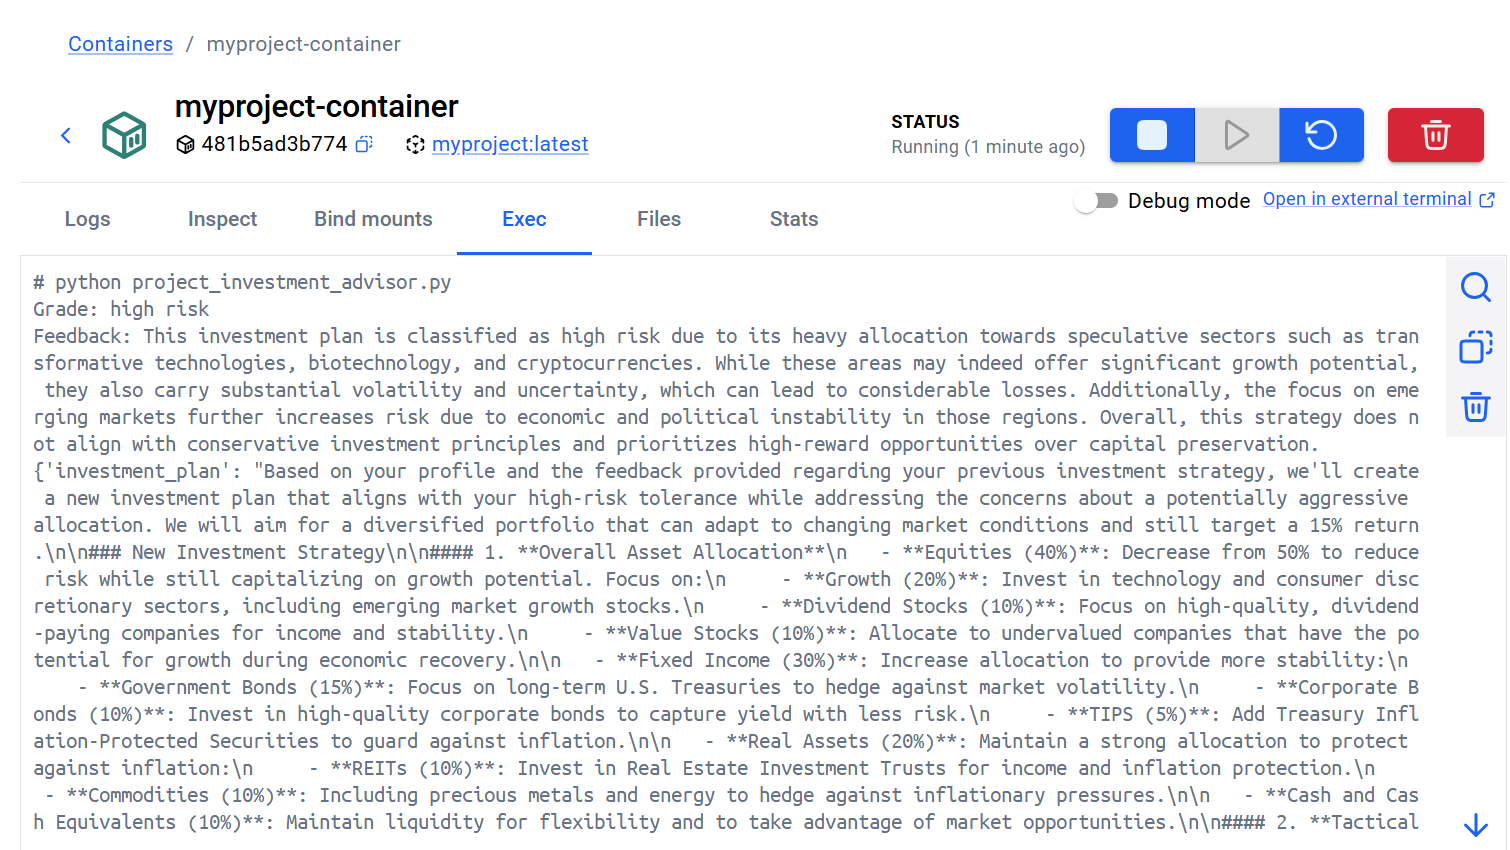
This image shows the results of running the project in a Docker terminal, demonstrating the workflow output as seen during execution.
Summary of LangGraph Workflow Patterns
| Pattern | Best For | Example Project |
|---|---|---|
| Prompt Chaining | Step-by-step generation | Job Application Assistant |
| Routing | Choosing between task types | Summarization vs Translation Router |
| Parallelization | Running independent tasks together | Multilingual Translation Assistant |
| Orchestrator-Worker | Breaking a complex task into subtasks | Catering Menu Planner |
| Reflection | Iterative improvement with feedback | Investment Plan Optimizer |
Resources
- LangGraph Documentation
- FastAPI Documentation
- LangChain
- OpenAI API
- Agentic AI with LangGraph, CrewAI, AutoGen and BeeAI (Coursera Course)
GitHub Repository
GitHub Code: Automated Medical Case Review System with Langgraph
GitHub Code: LangGraph Workflow Patterns Through Practical Case Studies