GCP Vertex AI and Gemini Enterprise Agent Platform: Setup, Architecture, and Enterprise Workflows
Guide
Table of Contents
- Overview
- Vertex AI
- Gemini Enterprise Agent Platform
- Project Setup: Gemini via Vertex AI
- Step 1: Google Cloud Project Initialization
- Step 2: Authentication and Credentials
- Step 3: Configure a GCS Bucket for Uploads (Video/Audio/Image/Files)
- Step 4: Preparing the .env File
- Implementation Snippet
- Resources
Overview
This post introduces Google Cloud Platform’s Vertex AI and the Gemini Enterprise Agent Platform as part of an enterprise-ready generative AI stack. It explains how Vertex AI serves as Google’s unified AI and machine learning platform, while the Gemini Enterprise Agent Platform extends that foundation with agent orchestration, workflow automation, governance, and production integrations.
This post also walks through the practical setup required to use Gemini through Vertex AI, including project initialization, authentication, secure credential handling, environment configuration, and a Python implementation example. The goal is to provide both a conceptual understanding of the platform and a hands-on starting point for building production-grade AI systems on GCP.
Vertex AI
Vertex AI is Google Cloud’s unified AI and ML platform. It provides the infrastructure and services needed for machine learning, generative AI, model deployment, MLOps, model monitoring, training pipelines, vector search, multimodal AI, and cloud AI deployment. It also supports a wide range of model types, including Gemini models, open-source models, custom ML models, and traditional machine learning workflows.
Vertex AI mainly focuses on AI infrastructure, model lifecycle management, cloud AI services, ML engineering, and enterprise deployment.
Vertex AI Includes:
| Area | Capabilities |
|---|---|
| Generative AI Services | Gemini models, embeddings, image generation, video understanding |
| MLOps | pipelines, monitoring, evaluation, deployment, scaling |
| ML Development | notebooks, AutoML, custom training, datasets |
| Infrastructure | GPUs, Kubernetes, Cloud Run, security, IAM |
Gemini Enterprise Agent Platform
The Gemini Enterprise Agent Platform is focused specifically on AI agents, multi-agent systems, workflow orchestration, and autonomous enterprise AI systems. It uses Gemini models, Vertex AI services, and enterprise orchestration capabilities as part of a larger enterprise AI workflow ecosystem.
It mainly focuses on enterprise AI assistants, autonomous workflows, AI orchestration, production agent systems, and enterprise-scale generative AI operations.
Consider that, the Gemini API and the Gemini Enterprise Agent Platform operate at different layers of the AI stack. The Gemini API is mainly for direct model access, letting developers build custom applications around Gemini features such as generation, multimodal prompting, function calling, and streaming. By contrast, the Gemini Enterprise Agent Platform is a broader production environment that adds orchestration, automation, monitoring, governance, security, deployment, and enterprise integrations. In short, the Gemini API helps you use the model, while the Gemini Enterprise Agent Platform helps you build, deploy, and manage enterprise-scale AI agents and workflows.
Gemini Enterprise Agent Platform Includes:
| Area | Capabilities |
|---|---|
| AI Agent Systems | autonomous agents, multi-agent workflows, reasoning systems |
| Workflow Automation | task orchestration, tool calling, API integration, workflow execution |
| Enterprise AI Operations | governance, monitoring, logging, IAM integration, security |
| Enterprise Integrations | databases, DevOps tools, enterprise APIs, cloud services |
Project Setup: Gemini via Vertex AI
This teaching document provides a step-by-step guide on how to configure a Google Cloud project to use Gemini models via Vertex AI and how to securely set up your .env file using a Base64-encoded service account key.
Step 1: Google Cloud Project Initialization
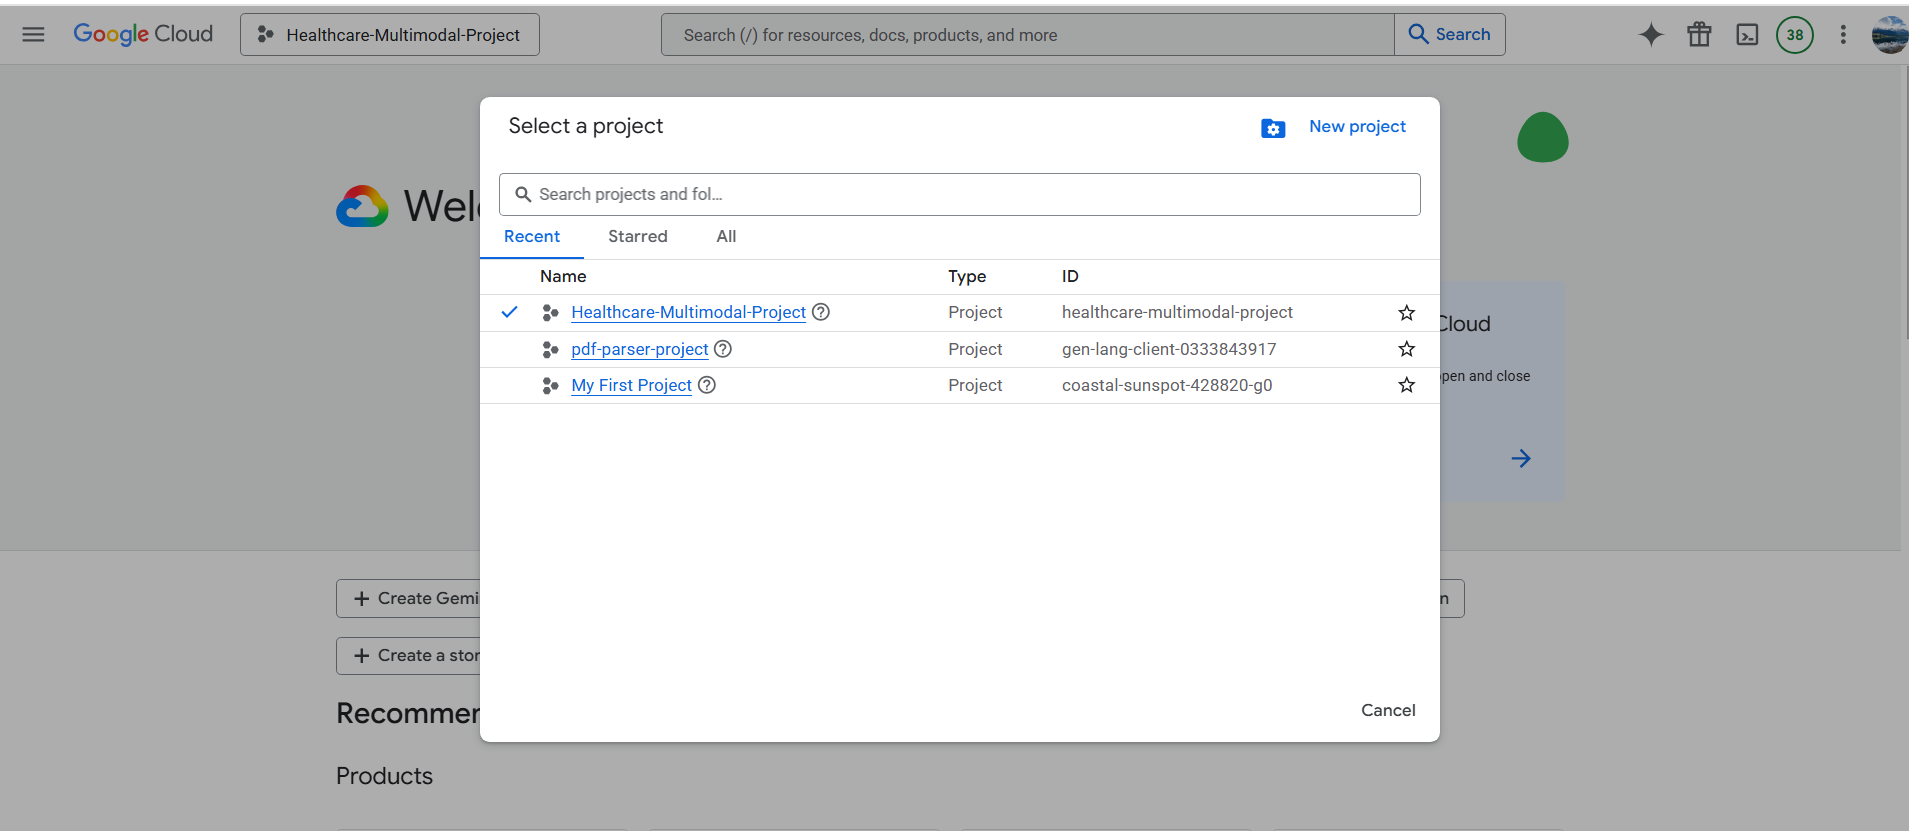
1-1-Create a Project:
- Go to the Google Cloud Console.
- Click the project dropdown in the top bar and select
New Project. - Give it a name, for example
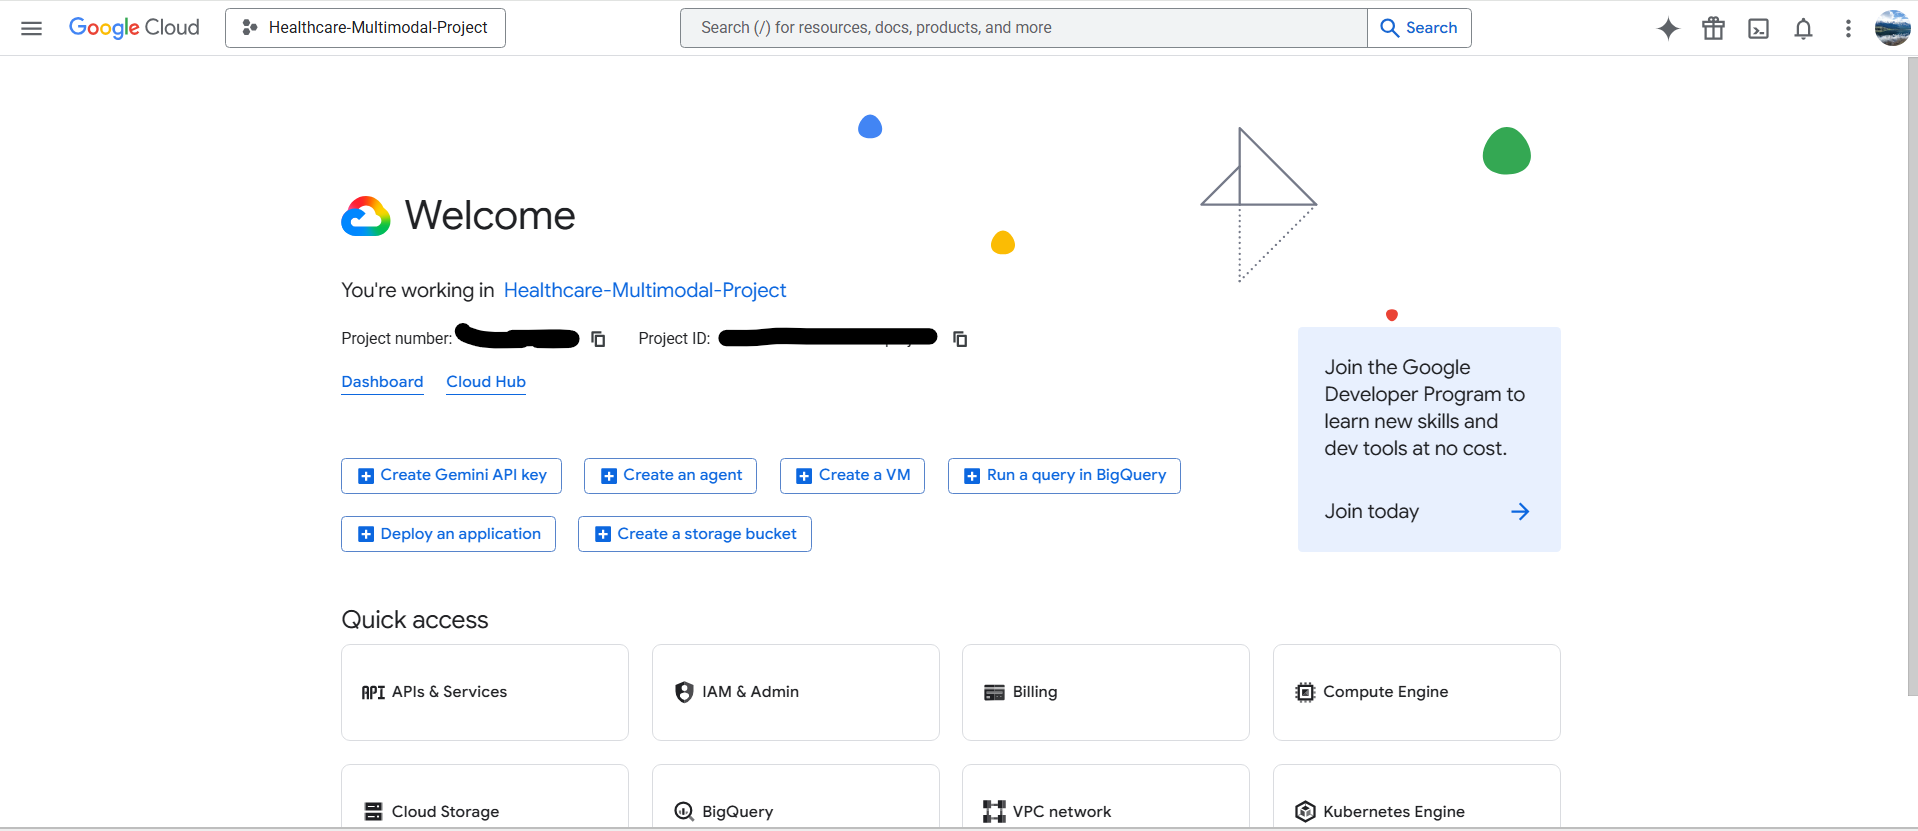
healthcare-ai-assistant, and note the generated Project ID.
1-2-Enable Billing:
Vertex AI requires an active billing account. Navigate to Billing in the sidebar and ensure your project is linked to a valid account.
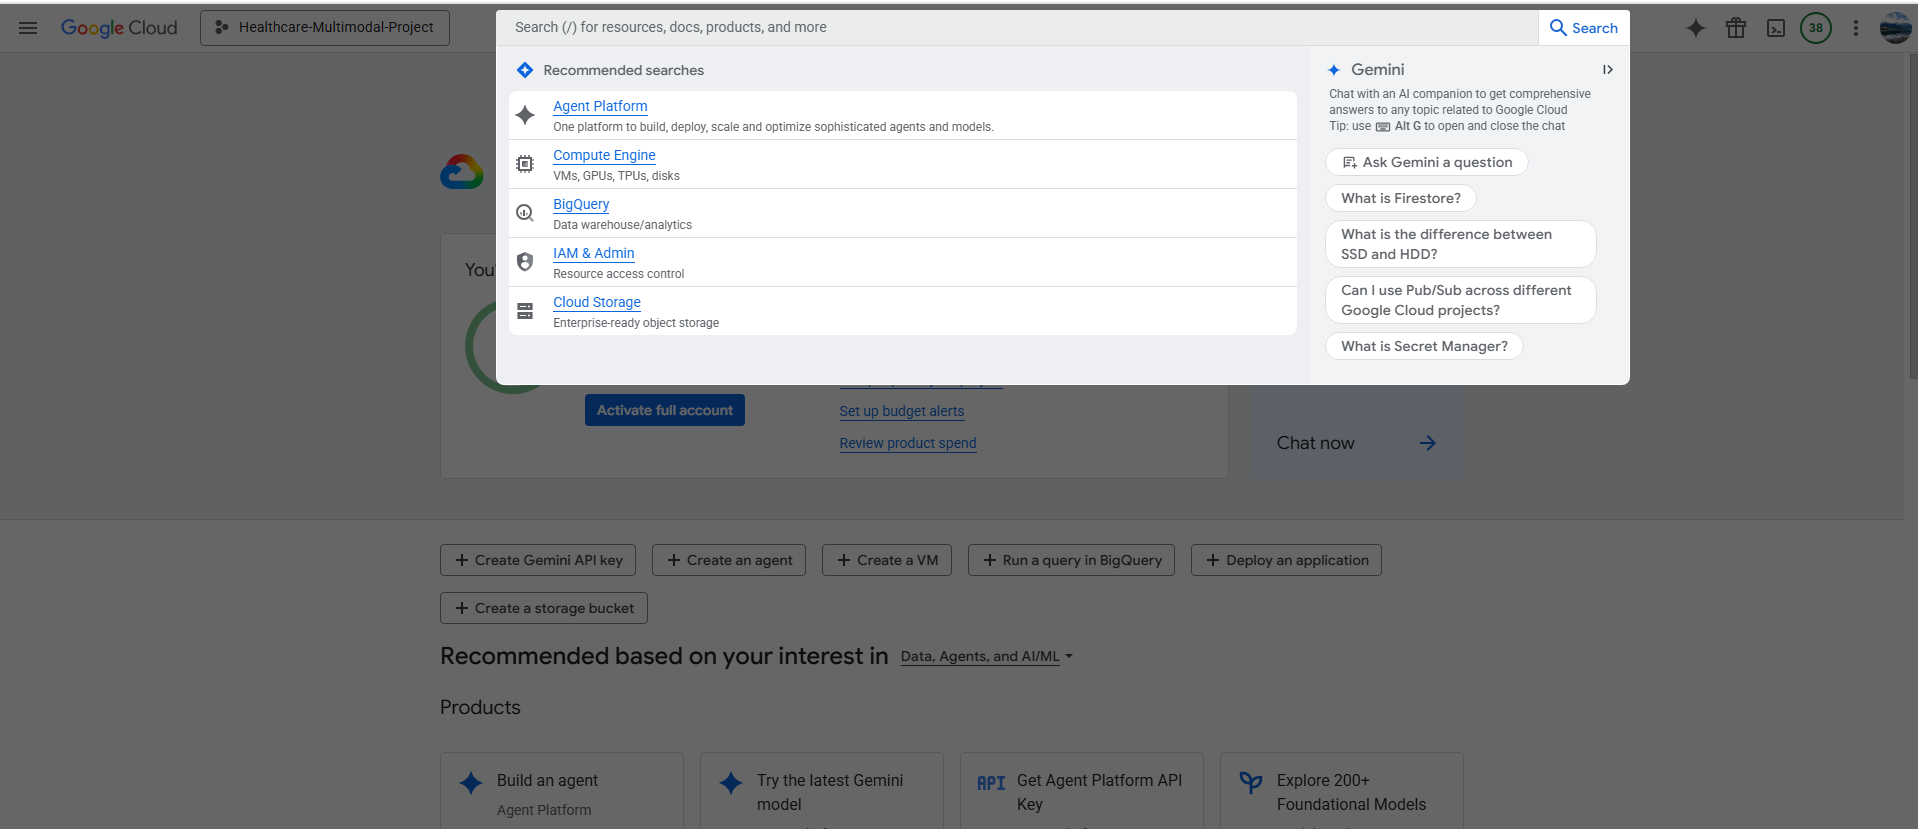
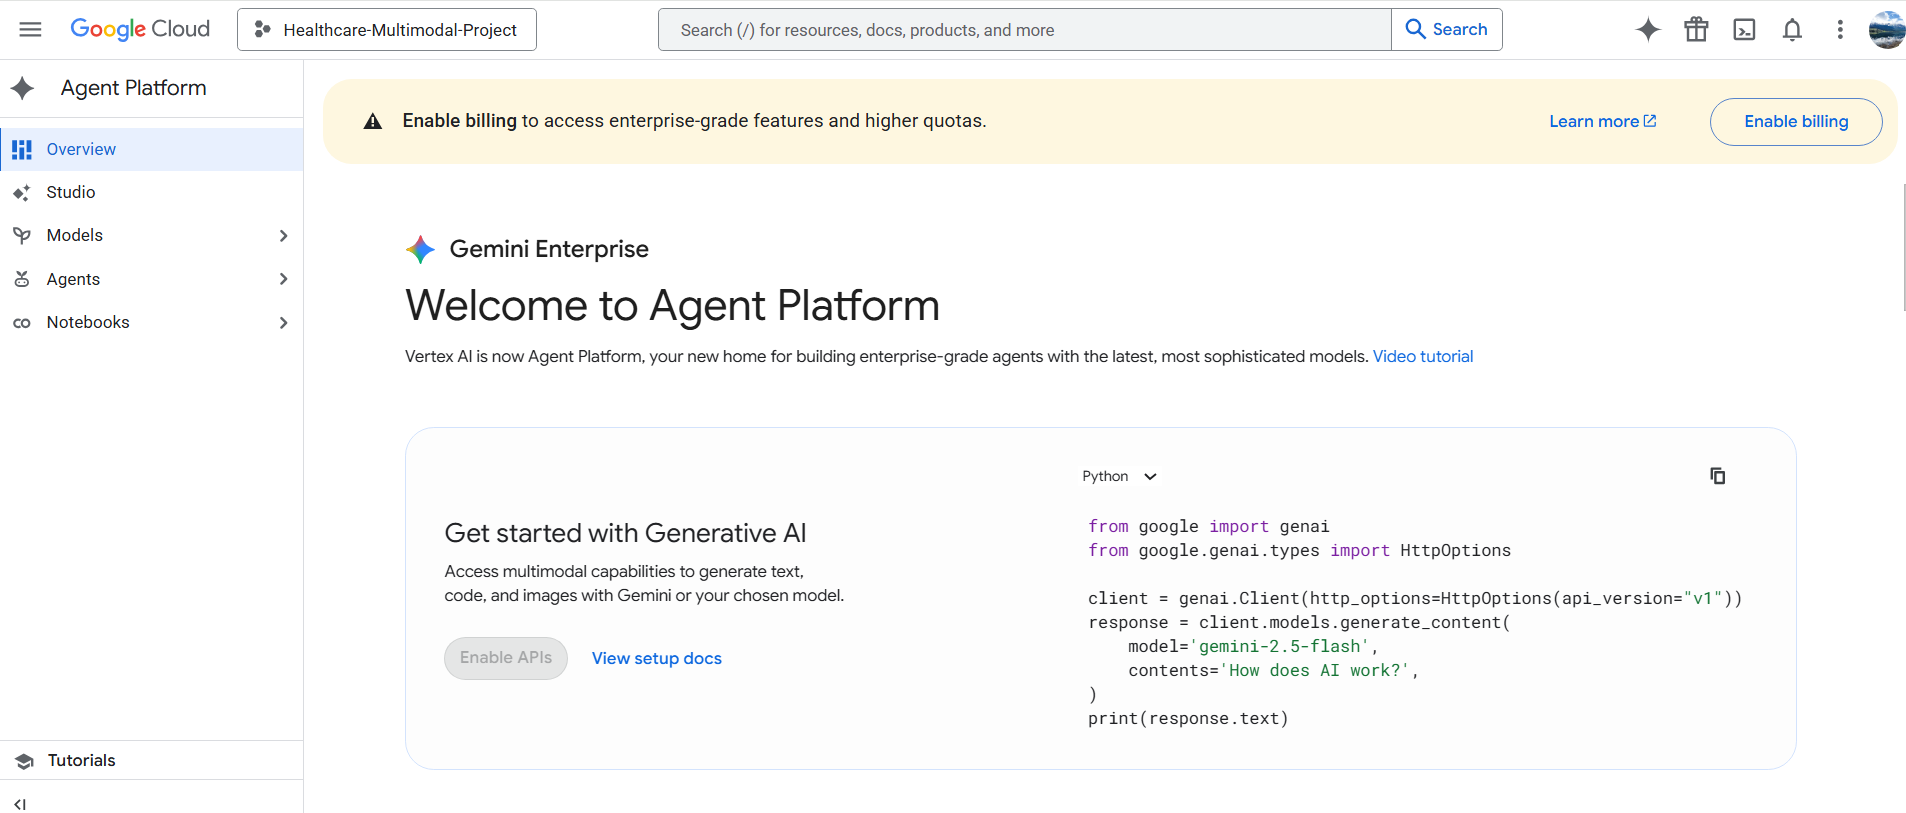
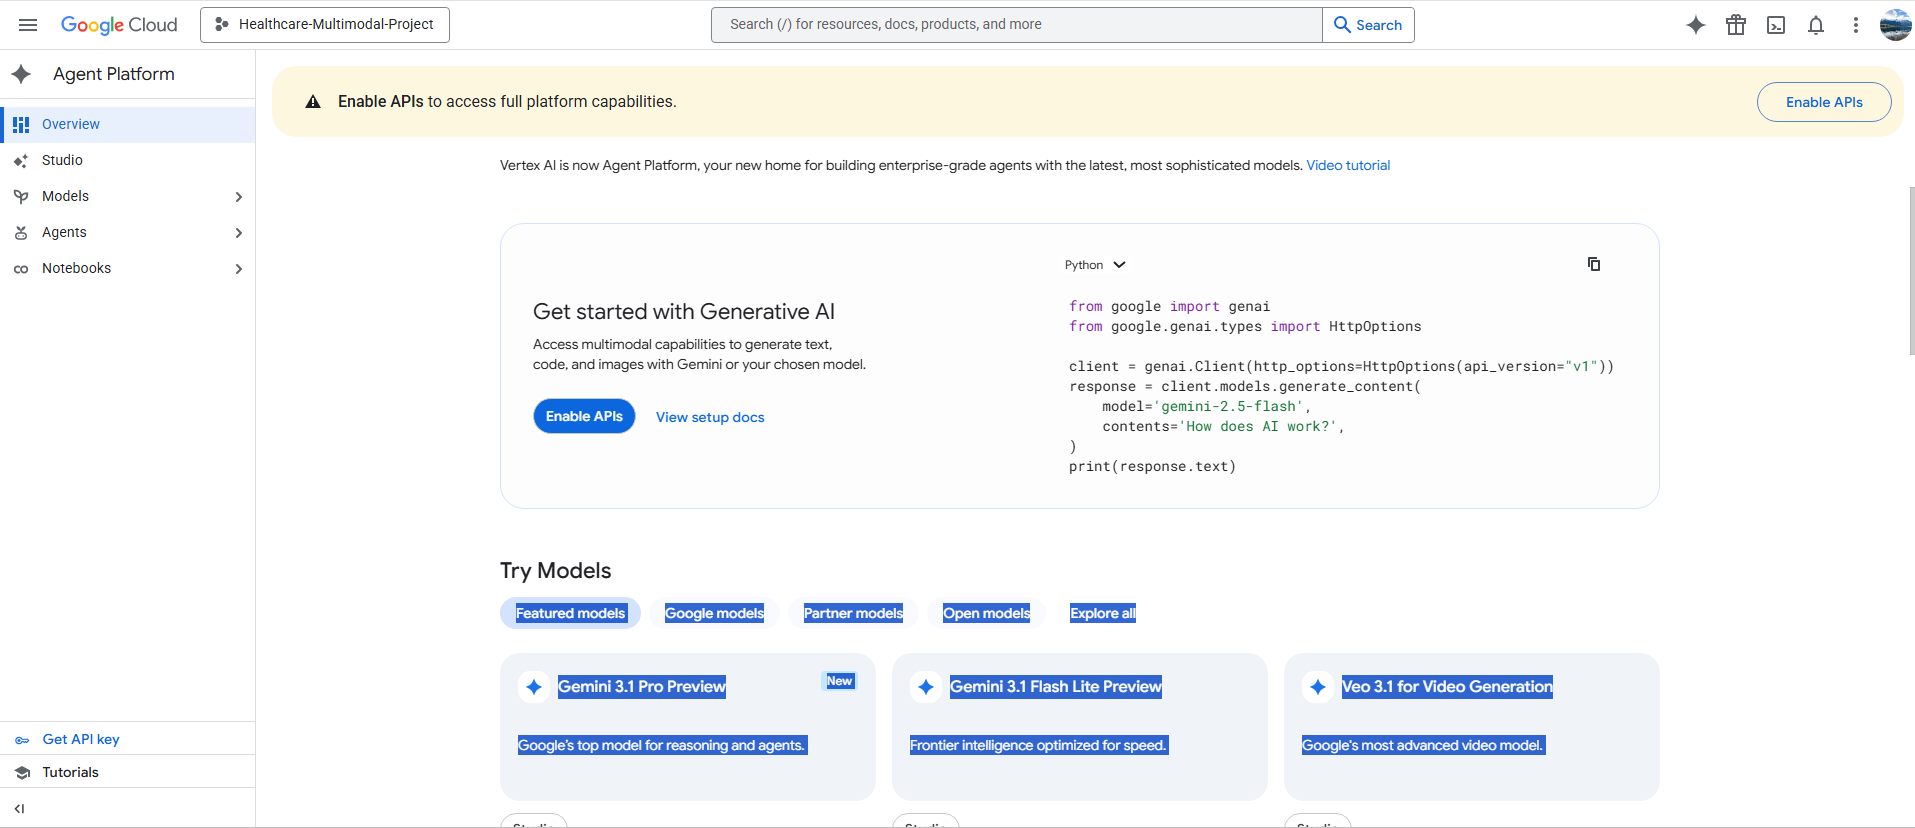
1-3-Enable the Vertex AI API
In the search bar, type Gemini Enterprise, Agent platform, or Vertex AI API.
Because Vertex AI API capabilities are transitioning into the broader Gemini Enterprise Agent Platform experience, the naming in the console may vary. Open the relevant result and click Enable so your project can communicate with Gemini models.
The following images illustrate these steps:
Step 2: Authentication and Credentials
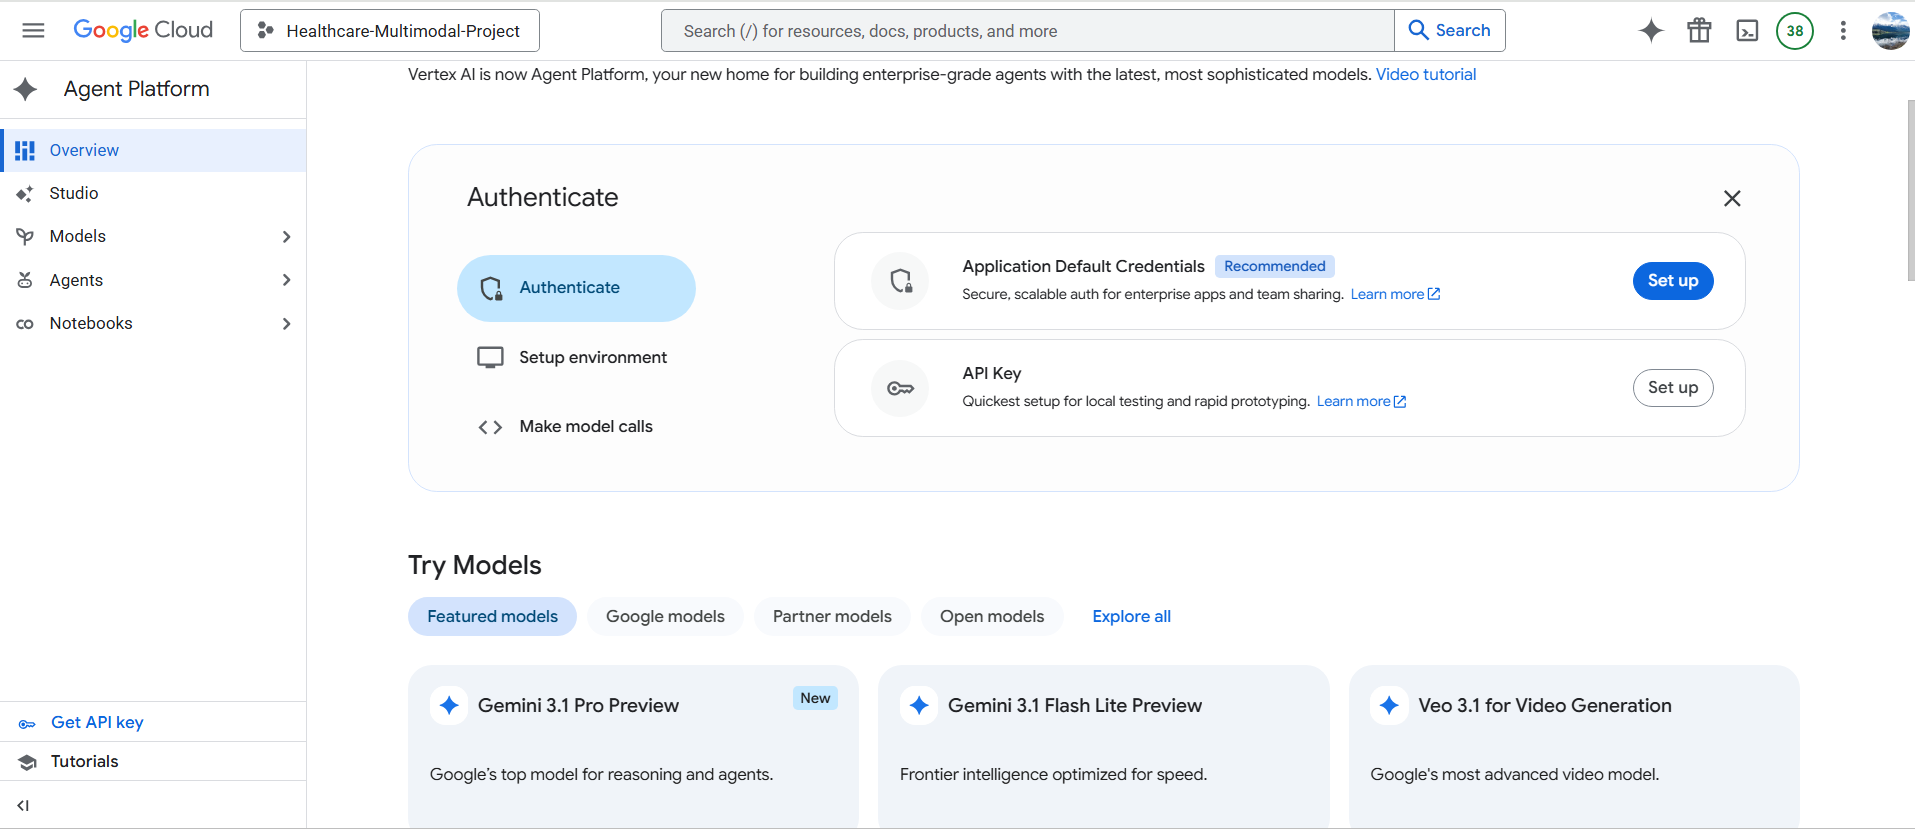
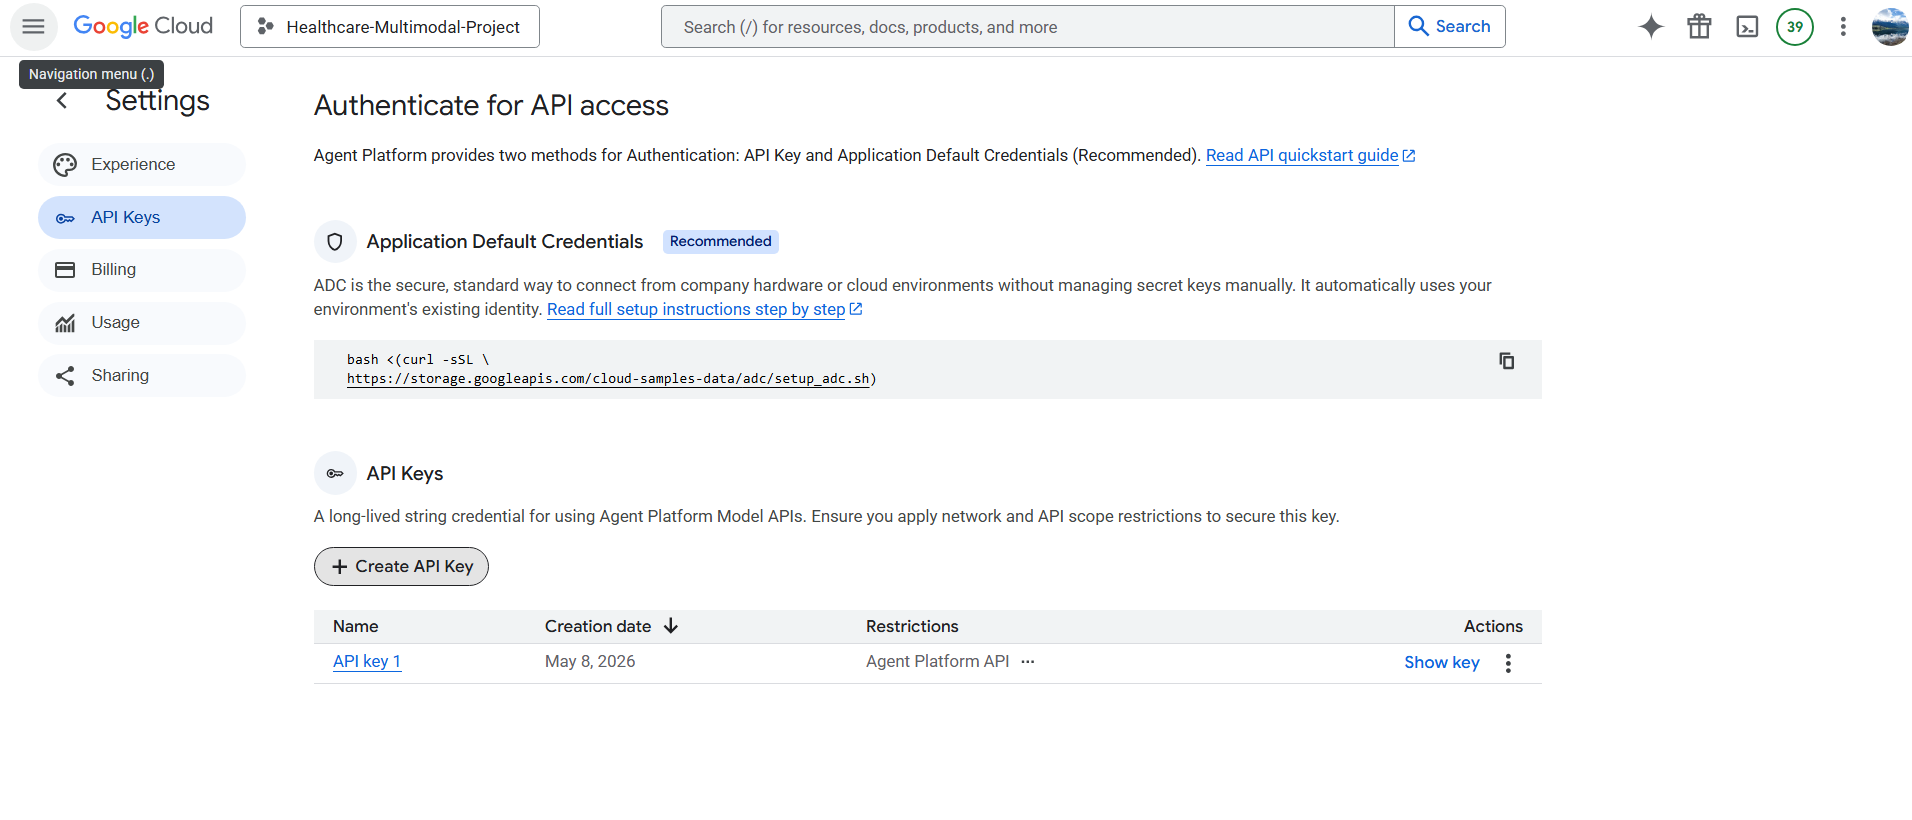
To use Gemini on the Gemini Enterprise Agent Platform, you need to authenticate with either a Google Cloud API key or Application Default Credentials. For quick testing, an API key may be enough. For production, Application Default Credentials or a service account is the recommended approach.
2-1-Create a Service Account:
- Go to
IAM & Admin > Service Accounts. - Click
Create Service Account. - Name it
gemini-assistantand clickCreate and Continue.
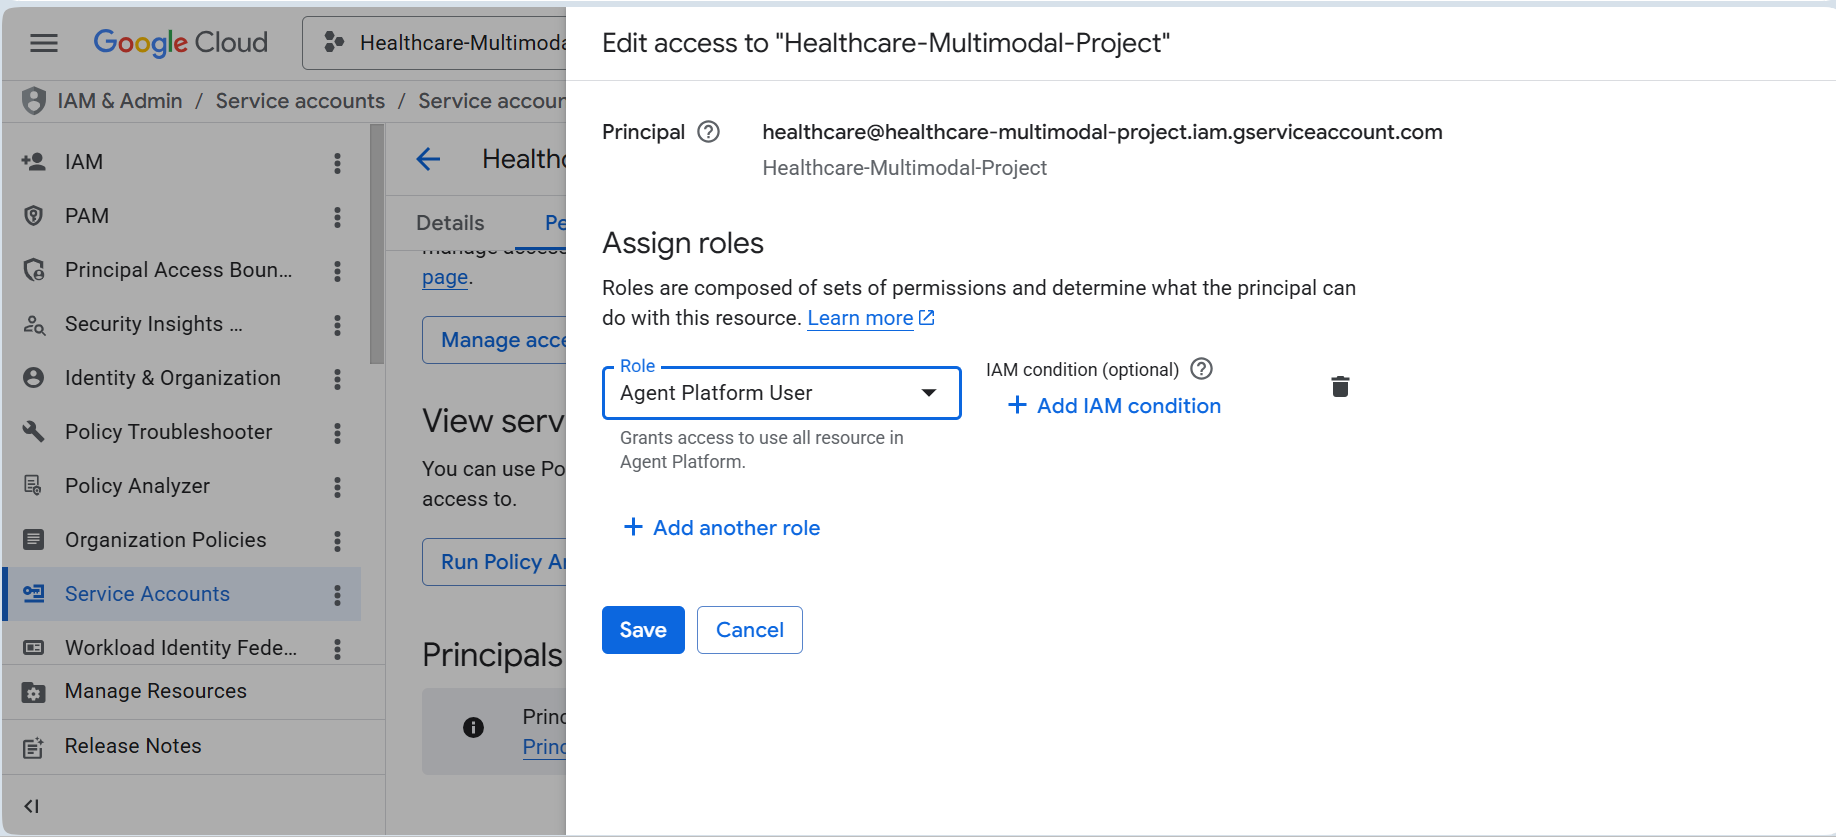
2-2-Assign Roles:
Under Grant this service account access to project, select the role:
Vertex AI User
Then click Continue and Done.
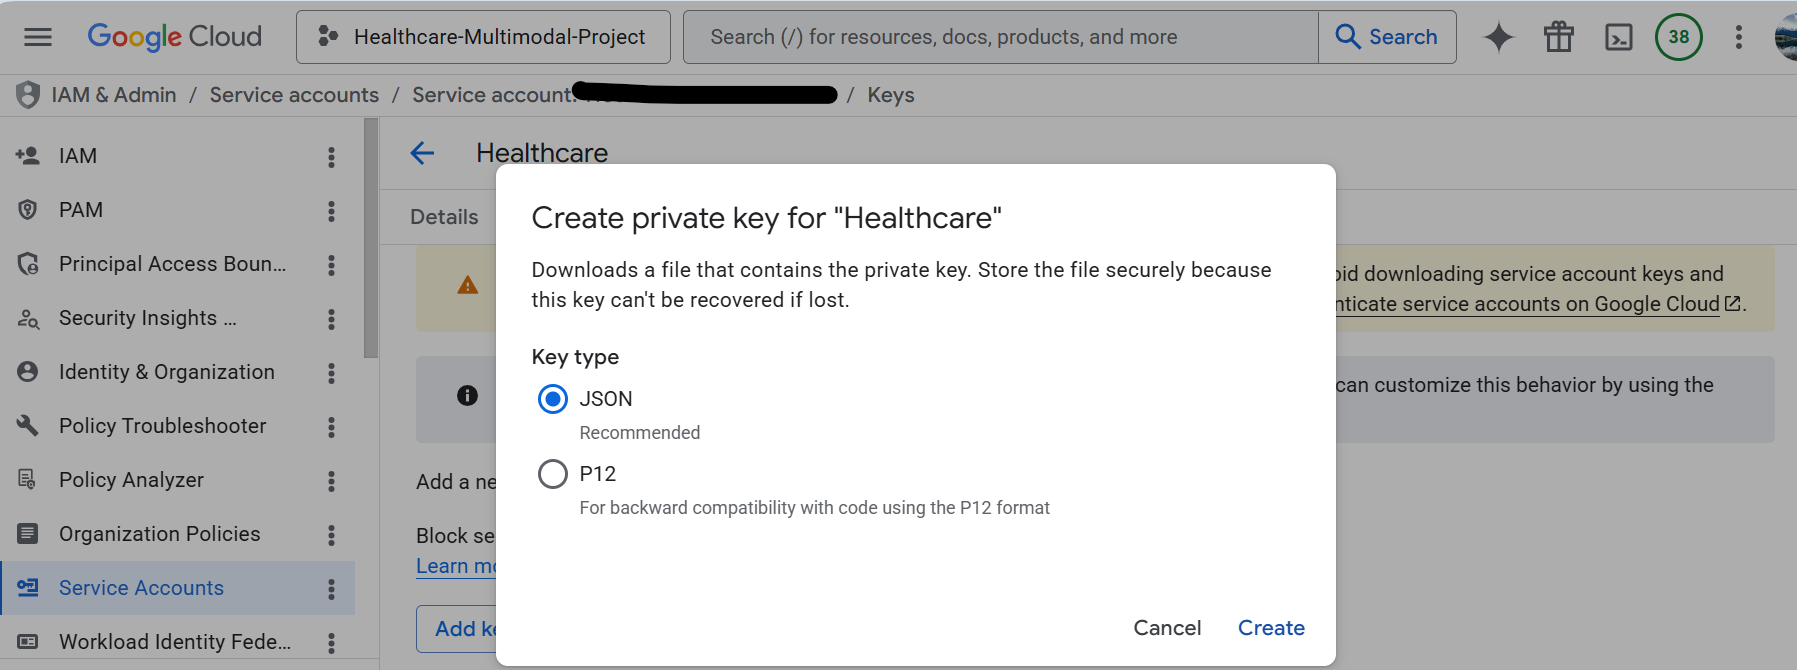
2-3-Generate the JSON Key
- Click the email address of your new service account.
- Open the
Keystab. - Click
Add Key > Create new key. - Select
JSONand clickCreate.
This downloads a service account JSON file to your machine. Keep this file private.
The following images illustrate these steps:
Step 3: Configure a GCS Bucket for Uploads (Video/Audio/Image/Files)
For many Gemini and enterprise AI workflows, you need a durable upload location for media and documents. Google Cloud Storage (GCS) is the standard choice for storing video, audio, images, and other files before they are processed by your application.
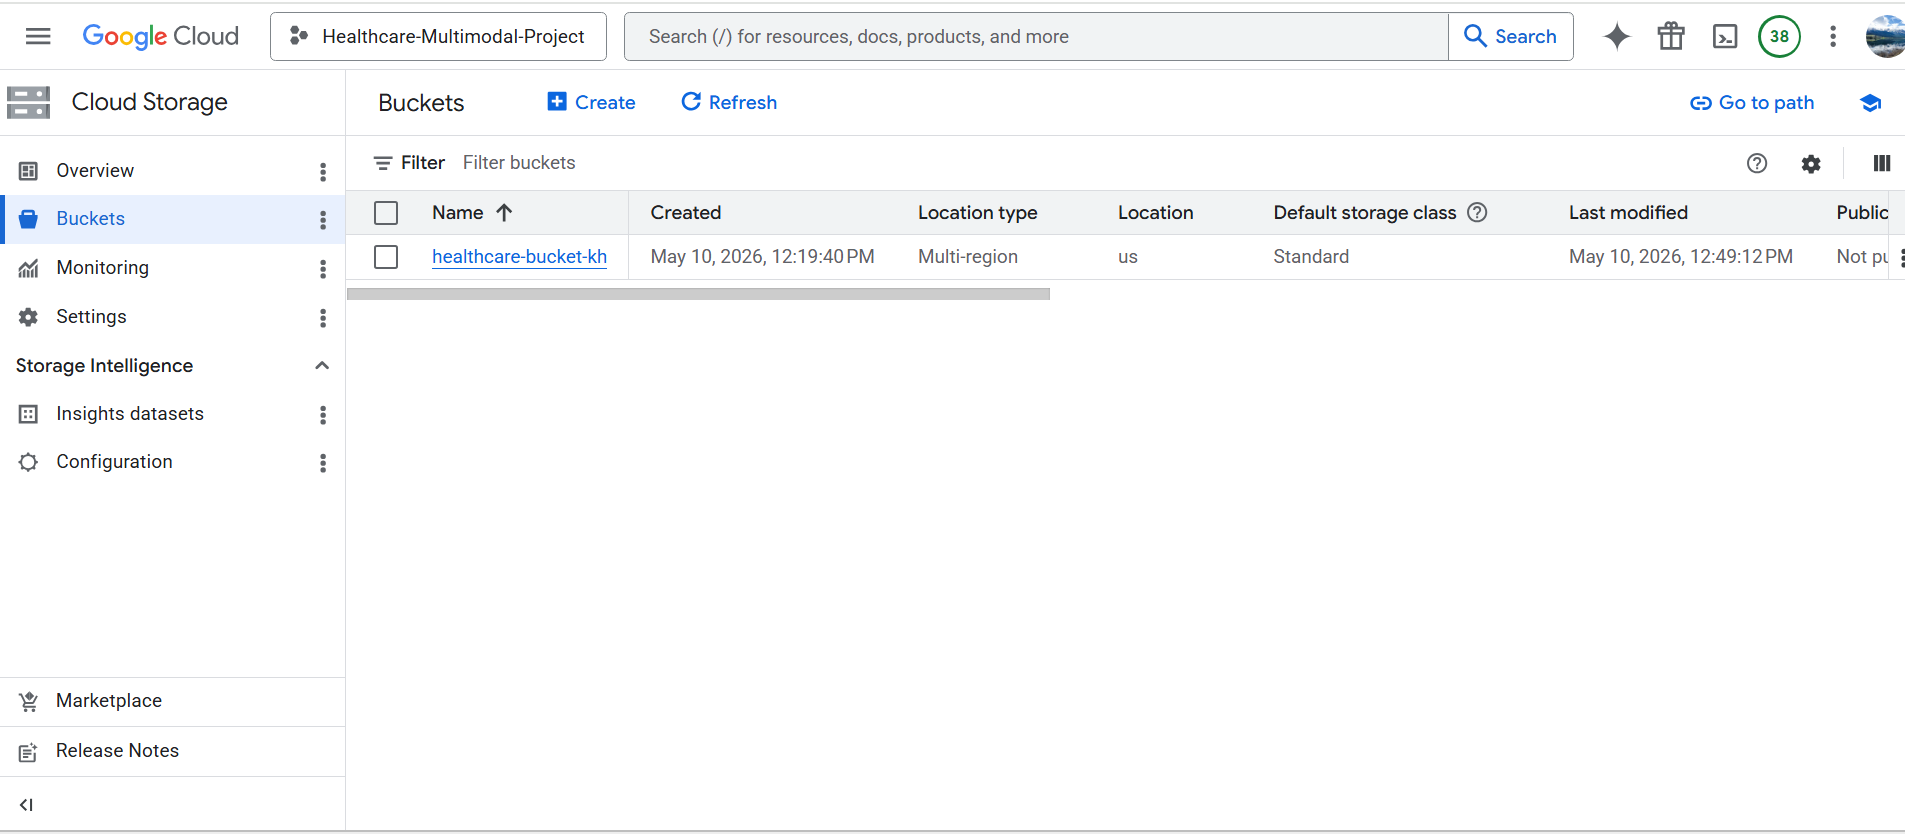
3-1-Create a Bucket (Console):
- In Google Cloud Console, go to
Cloud Storage > Buckets. - Click
Create. - Enter a globally unique bucket name, for example
healthcare-ai-uploads-<project-id>. - Choose a region close to your users and services (for example
us-central1). - Select a default storage class (for most workloads,
Standardis a good default). - Keep access control as
Uniformunless you need object-level ACLs. - Click
Create.
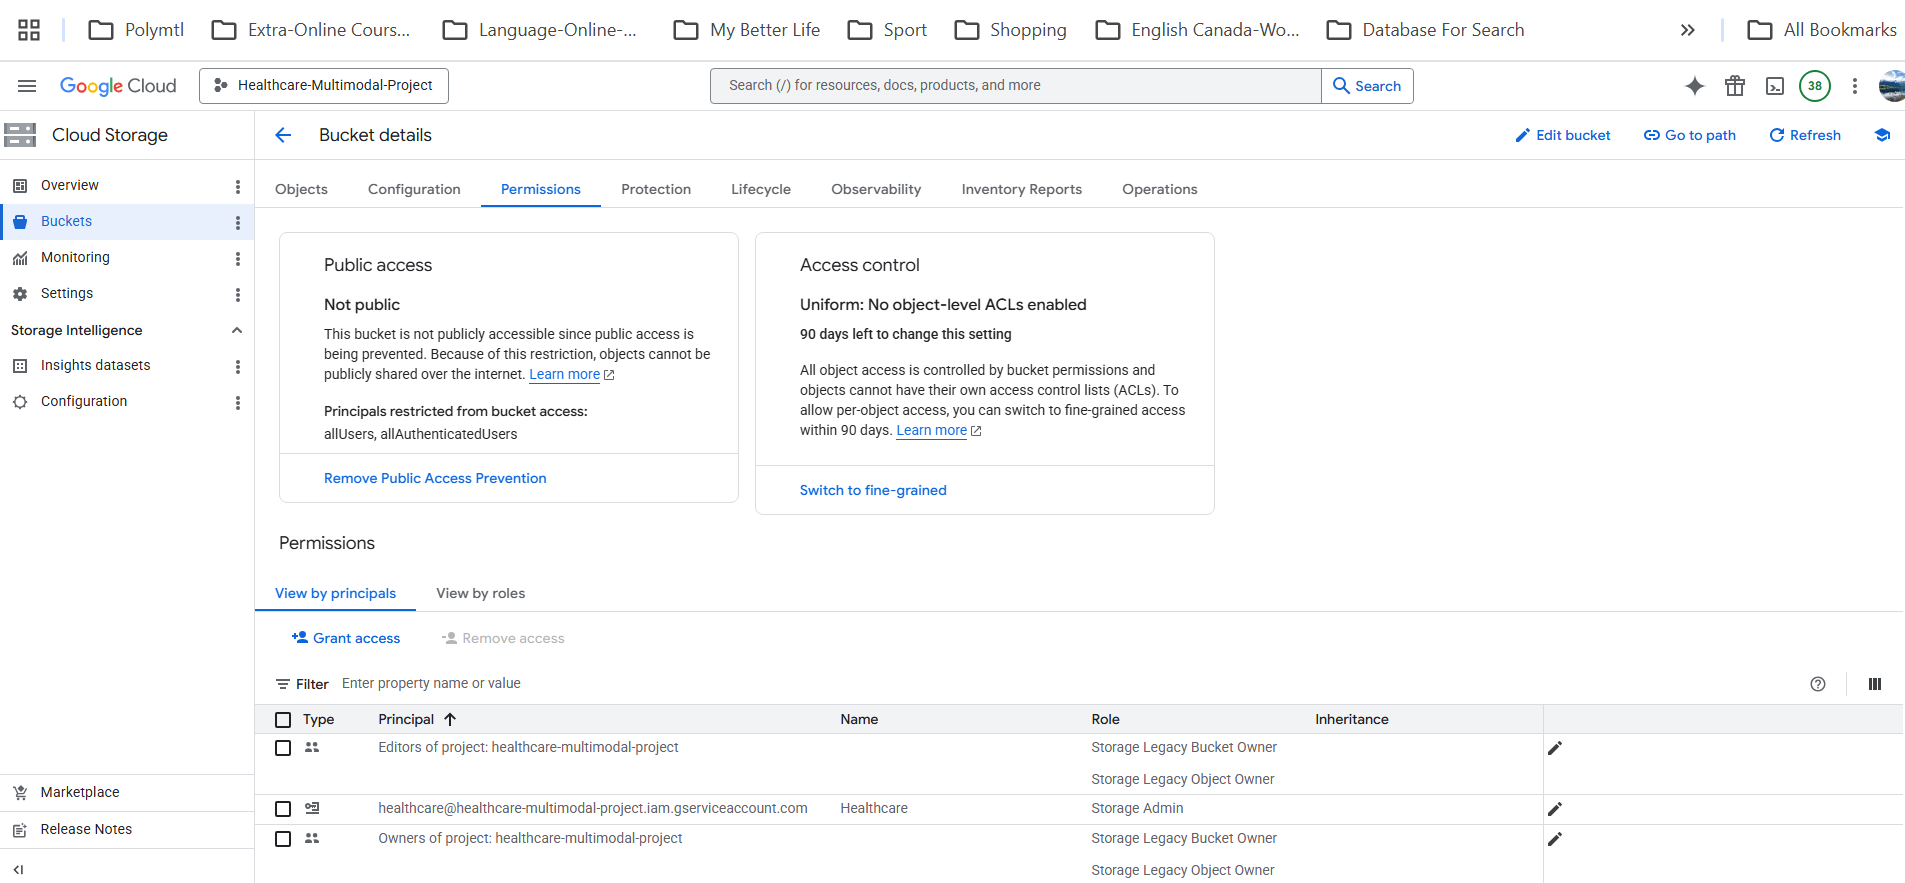
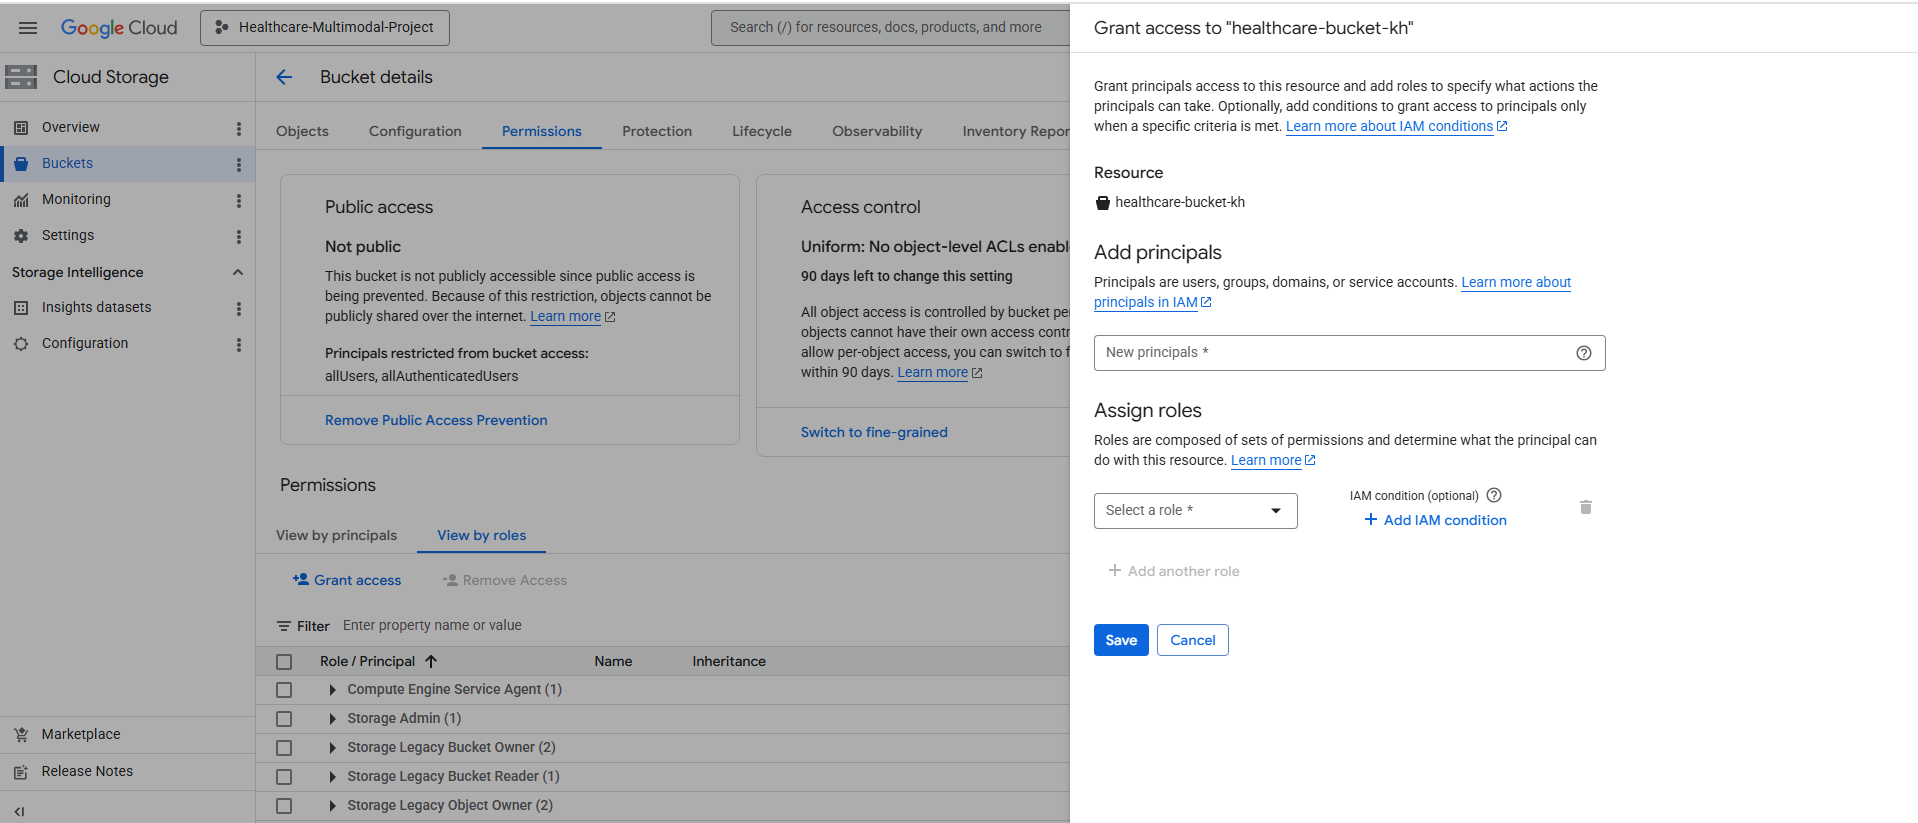
3-2-Set Permissions for Upload Workflows:
Grant least-privilege roles to your app service account.
Storage Object Viewer: read objectsStorage Object Creator: upload new objectsStorage Object Admin(optional): full object lifecycle management
For upload-only pipelines, prefer Creator + Viewer instead of full admin.
3-3-Enable Security and Lifecycle Settings:
Recommended production settings:
- Turn on Object Versioning only if you need rollback history.
- Add Lifecycle rules to delete or archive old uploads.
- Use CMEK if your organization requires customer-managed encryption.
- Avoid making the bucket public unless there is a strict use case.
This gives your application a consistent location for media uploads used by AI pipelines.
The following images illustrate these steps:
Step 4: Preparing the .env File
Storing a raw JSON key directly in a .env file can cause formatting errors due to quotes and line breaks. A safer and cleaner approach is to Base64-encode the key.
4-1-Encode the Key
Open your terminal and run the command that matches your operating system.
macOS / Linux
1
base64 -i your-key-filename.json -o - | tr -d '\n'
Windows (PowerShell)
1
[Convert]::ToBase64String([IO.File]::ReadAllBytes("your-key-filename.json"))
4-2-Configure the .env File
Create a file named .env in your project root directory and add the following values:
# Google Cloud Project ID found in the Console Dashboard
PROJECT_ID=your-unique-project-id

# The long Base64 string you just generated
SERVICE_ACCOUNT_KEY=ewogICJ0eXBlIjogInNlcnZpY2VfYWN...

# The region for the Vertex AI service
VERTEX_AI_LOCATION=us-central1

# The bucket settings
GCS_BUCKET_NAME=your-upload-bucket-name
GCS_UPLOAD_PREFIX=uploads/
Implementation Snippet
To use these environment variables in Python, you can combine python-dotenv with the Vertex AI SDK.
1
2
3
4
5
6
7
8
9
10
11
12
13
14
15
16
17
18
19
20
21
22
23
24
import os
import base64
import json
from dotenv import load_dotenv
import vertexai
from vertexai.generative_models import GenerativeModel

load_dotenv()

# 1. Decode the key from .env to a temporary dictionary or file
decoded_key = json.loads(base64.b64decode(os.getenv("SERVICE_ACCOUNT_KEY")))

# 2. Initialize Vertex AI
# In production, you would usually write the decoded key to a temporary file
# and point GOOGLE_APPLICATION_CREDENTIALS at that file.
vertexai.init(
  project=os.getenv("PROJECT_ID"),
  location=os.getenv("VERTEX_AI_LOCATION")
)

# 3. Load Gemini
model = GenerativeModel("gemini-1.5-flash")
response = model.generate_content("What are the benefits of AI in healthcare?")
print(response.text)
Critical Security Note:
- Add
.envto your.gitignoreso credentials are never uploaded to GitHub or GitLab. - If you suspect a key is leaked, delete it immediately in the GCP Console and generate a new one.