Azure Machine Learning: Building an ML Pipeline with Azure Machine Learning Studio
Guide
Table of Contents
- Introduction
- End-to-End ML Workflow in Azure
- Step 1: Create Azure ML Workspace
- Step 2: Create Compute Resources
- Step 3: Explore Data
- Step 4: Train a Machine Learning Model
- Step 5: Deploy Model as a Service
- Step 6: Test the Model
Introduction
Azure Machine Learning (Azure ML) is a cloud-based platform for building, training, deploying, and managing machine learning models.
What It Enables
- End-to-end machine learning lifecycle
- Data preparation
- Model training
- Deployment
- Monitoring
- Low-code tools (Designer) and full-code workflows
Key Advantage
Efficient use of cloud compute resources instead of local infrastructure.
End-to-End ML Workflow in Azure
Step 1: Create Azure ML Workspace
Workspace is a central hub for the ML lifecycle and serves as the primary resource for managing data, models, compute resources, and experiments in one place.
Steps:
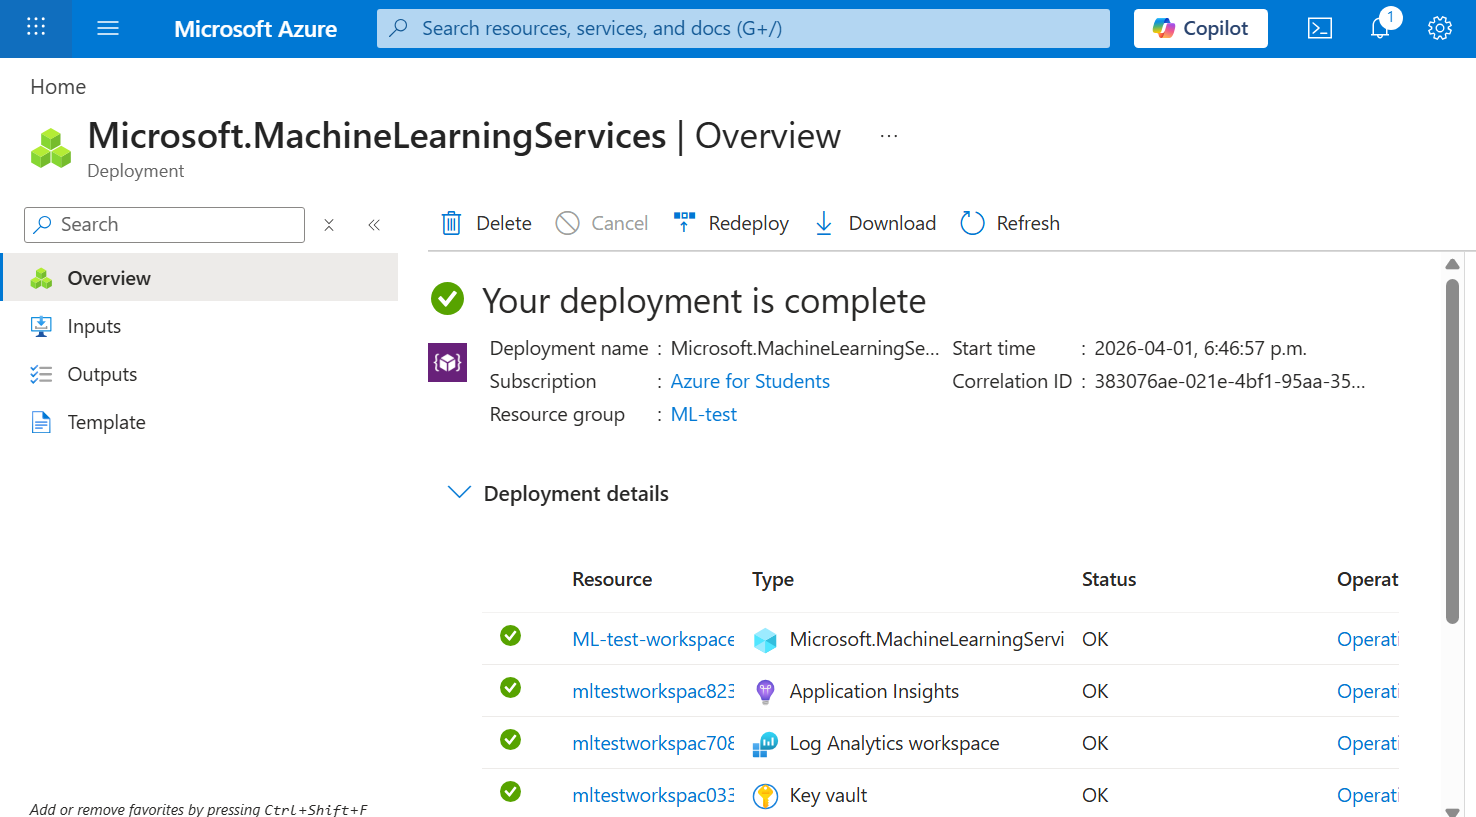
- Go to Azure Portal.
- Create a Machine Learning resource.
- Configure:
- Subscription: Your Azure subscription
- Resource group: Create or select
- Workspace name: Unique name
- Region: Closest region
- Storage account: Auto-created
- Key Vault: Auto-created
- Application Insights: Auto-created
- Container registry: Auto-created when needed
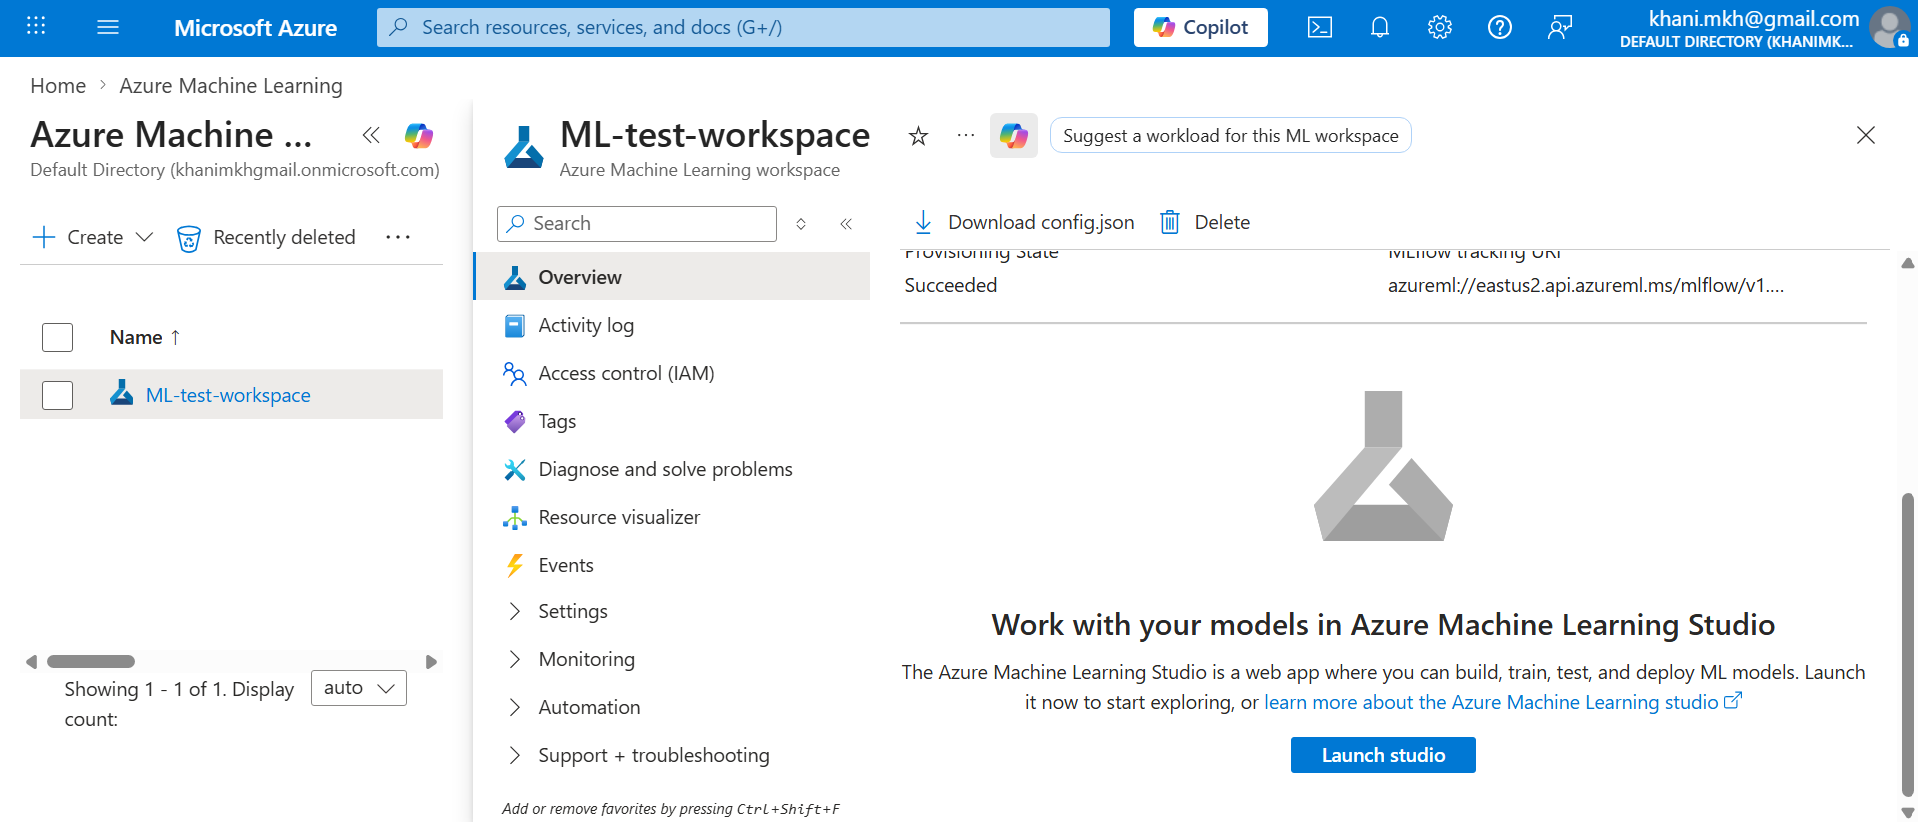
- Open Azure ML Studio.
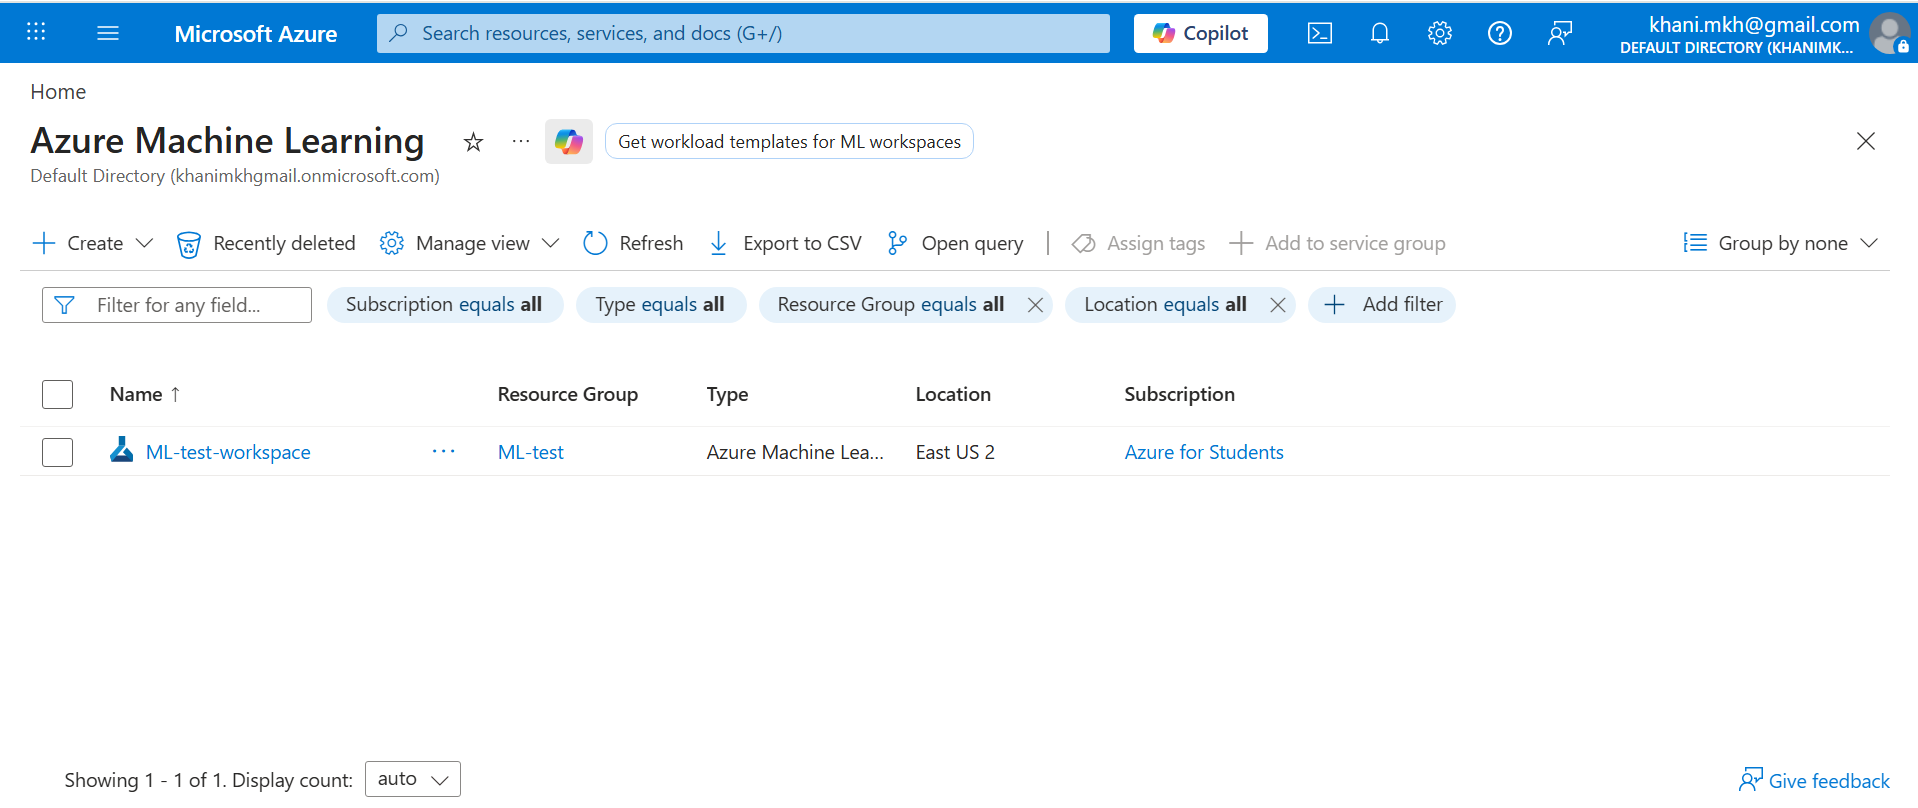
Then click on created worspace and click on “Lunch studio”
Step 2: Create Compute Resources
After creating an Azure ML workspace, you can manage all the assets and resources required to build machine learning solutions. At its core, Azure Machine Learning is a platform for training and managing ML models, which requires compute resources to run training workloads. So, Azure ML uses cloud compute for training and deployment.
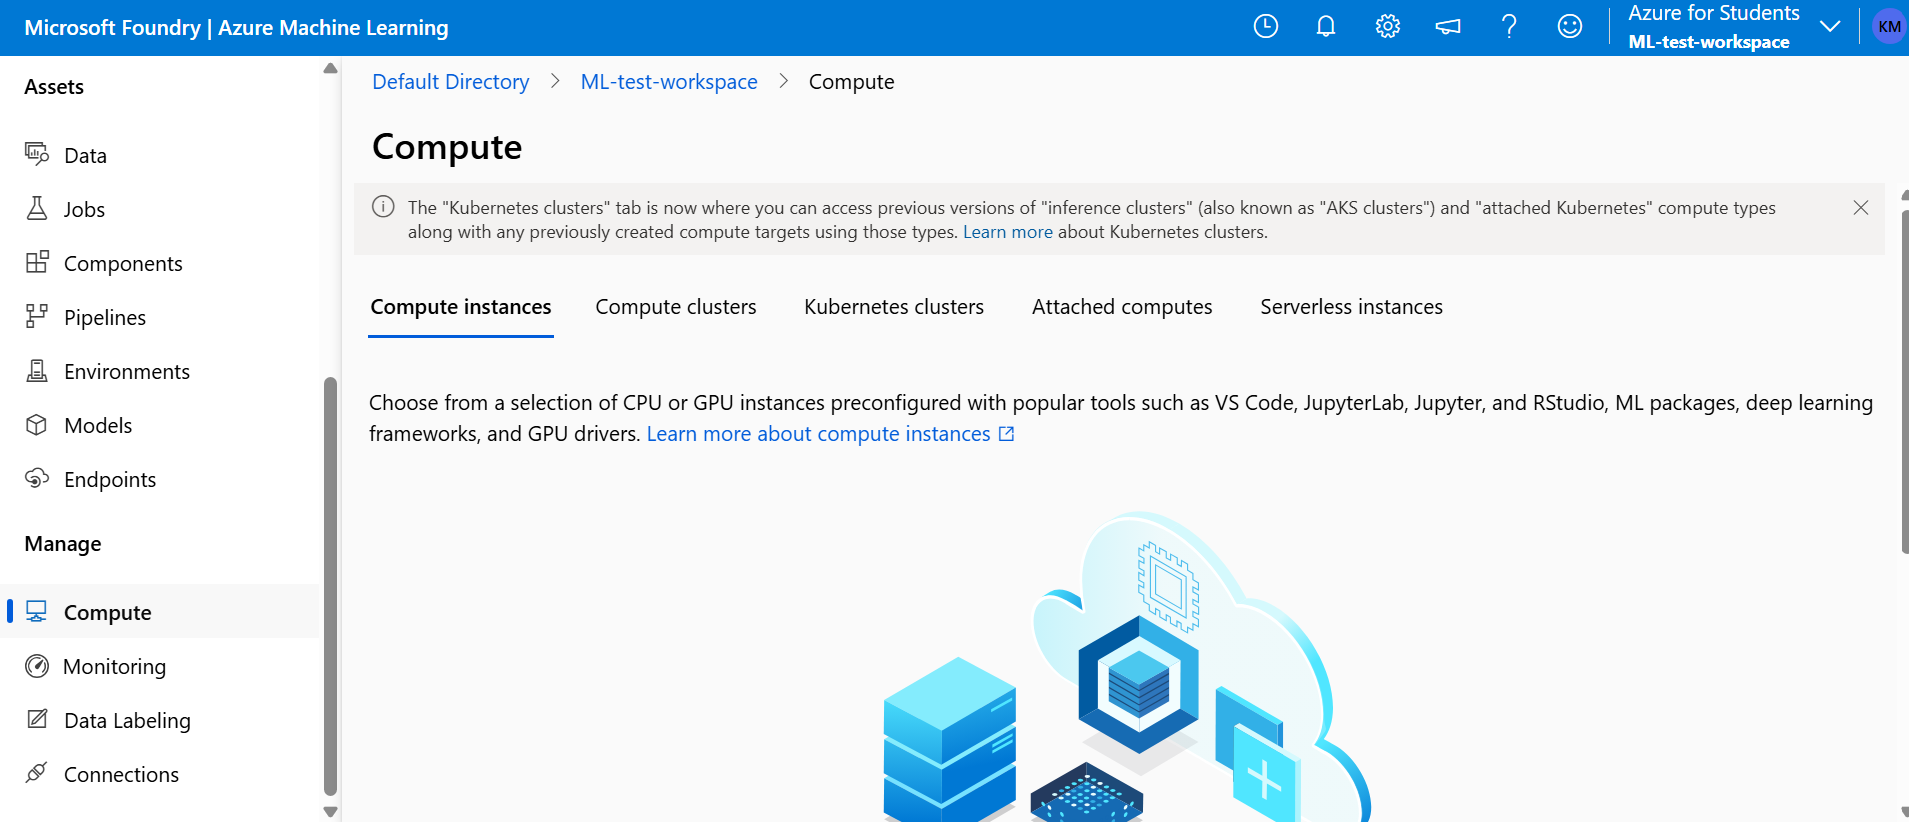
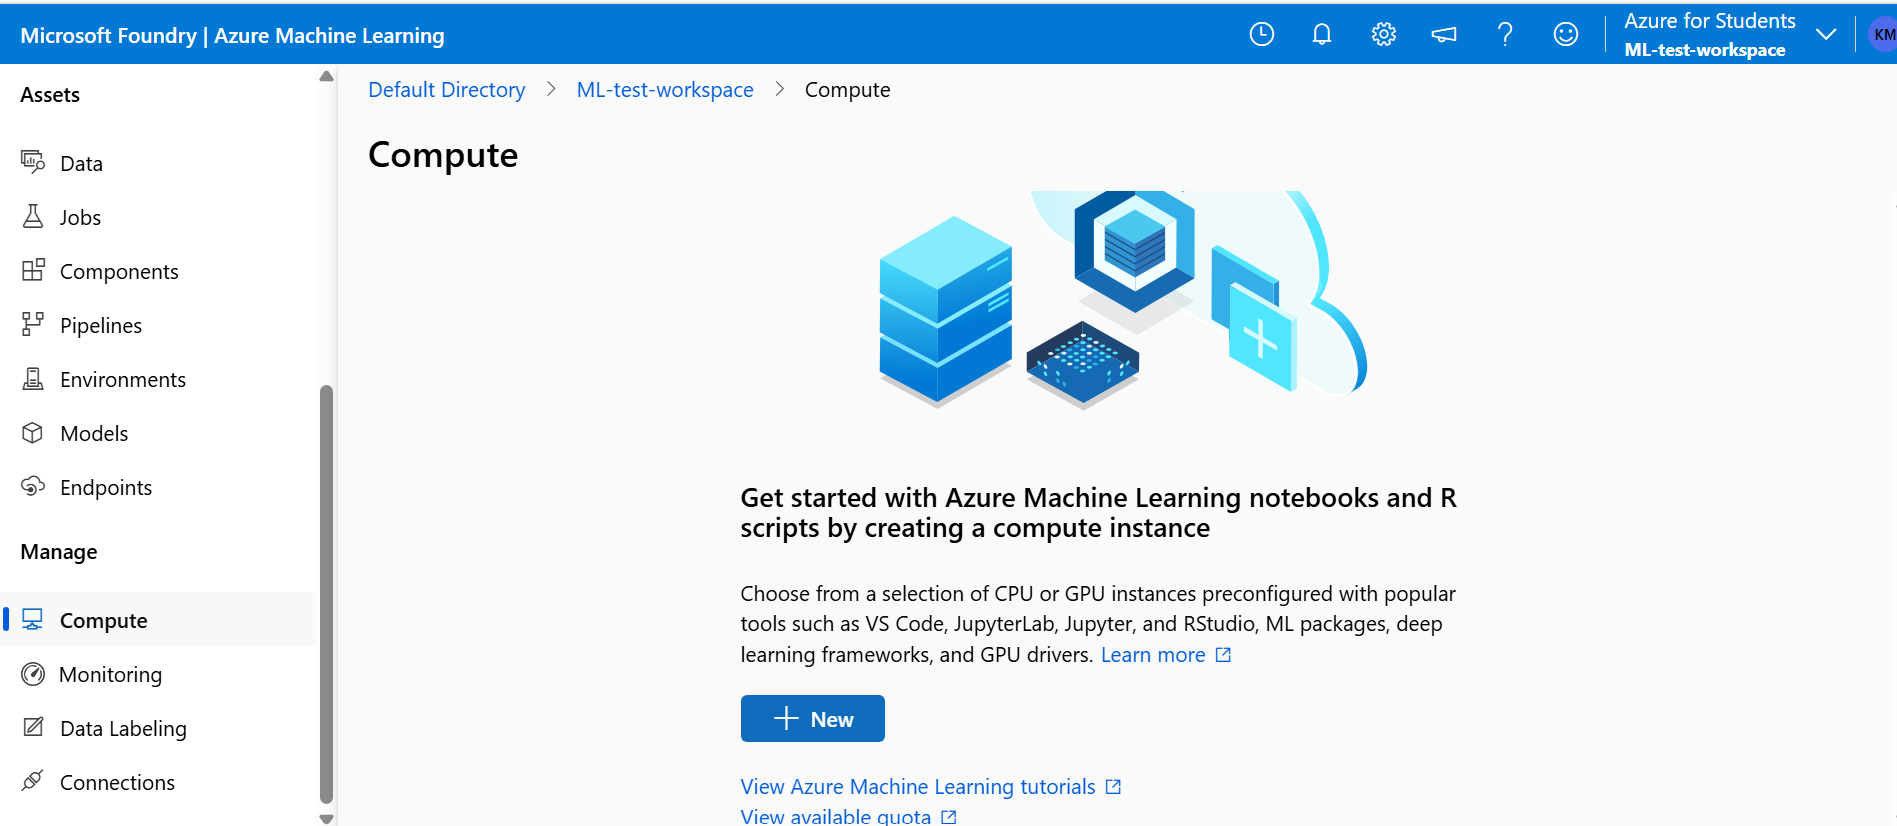
In Azure Machine Learning Studio, view Compute Page, under Manage. This is where you can manage the Compute targets.
Step 2.1: Types of Compute
| Type | Purpose |
|---|---|
| Compute Instance | Development environment |
| Compute Cluster | Scalable training |
| Inference Cluster | Model deployment |
| Attached Compute | External resources |
Compute Instance:
- A managed virtual machine for individual work by a data scientist or ML engineer.
- Best for interactive development in notebooks, quick testing, and debugging scripts.
- Usually always available once started, so it is convenient for day-to-day experimentation.
- Not designed for large distributed training workloads.
Compute Cluster:
- A pool of machines that scales up and down automatically based on queued jobs.
- Best for training runs, hyperparameter tuning, and batch experiments.
- Helps reduce cost by scaling to zero when idle (if configured with minimum nodes = 0).
- Supports parallel job execution for faster experimentation.
Inference Cluster:
- A Kubernetes-based compute target (commonly AKS) for serving models in production.
- Best for real-time, high-availability prediction APIs.
- Supports autoscaling, rolling updates, and traffic management for reliable deployments.
- Preferred when you need enterprise-grade performance and uptime.
Attached Compute:
- Existing external compute resources connected to Azure ML (for example, Databricks, HDInsight, or VMs).
- Useful when your organization already has compute infrastructure or specialized environments.
- Lets you run ML workloads without migrating everything into Azure ML-managed compute.
- Gives flexibility, but setup and governance can be more complex than managed options.
Step 2.2: Create Compute Instance
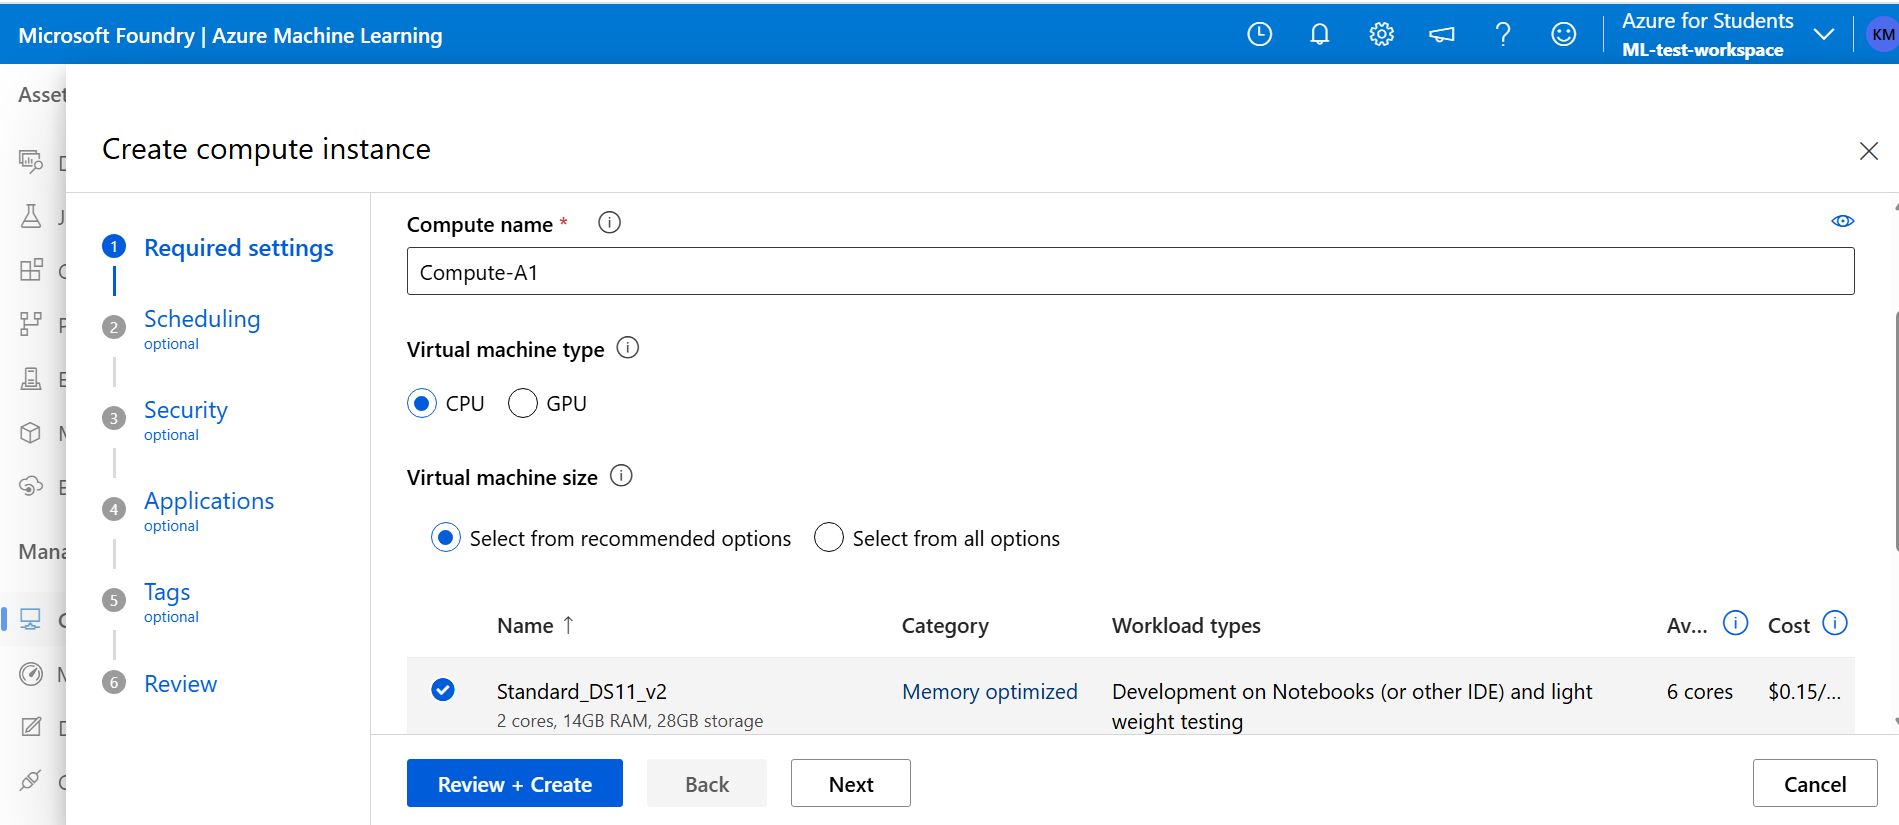
Click on Create then add a new copmute instance with the following setting:
- Compute Name: unique Name
- Virtual Machine type: CPU
- Virtual Machine size: Standard_DS11_v2
- SSH: Disabled
When it is created and ready.
Step 2.3: Create Compute Cluster
While compute instance is being created, switch to the Compute Clusters tab, and add a new computer cluster with following settings:
- Priority: Dedicated
- Virtual Machine type: CPU
- Virtual Machine size: Standard_DS11_v2
- Compute Name: Enter a unique name
- Min nodes: 0
- Max nodes: 2
- Idle time: 120 sec
- Enable SSH Access: Unselected
Notes:
- Clusters scale automatically, which is cost-efficient.
- Clusters are used for training experiments.
- If you do not use this module, be sure stop your compute instance to avoid unnecessary charges to your Azure subscription.
Step 3: Explore Data
Dataset Creation
This section uses a sample dataset of historical bicycle rentals to train a model that estimates the expected number of rentals for a specific day using seasonal and meteorological features.
Dataset used:
- Bicycle rental data
Steps
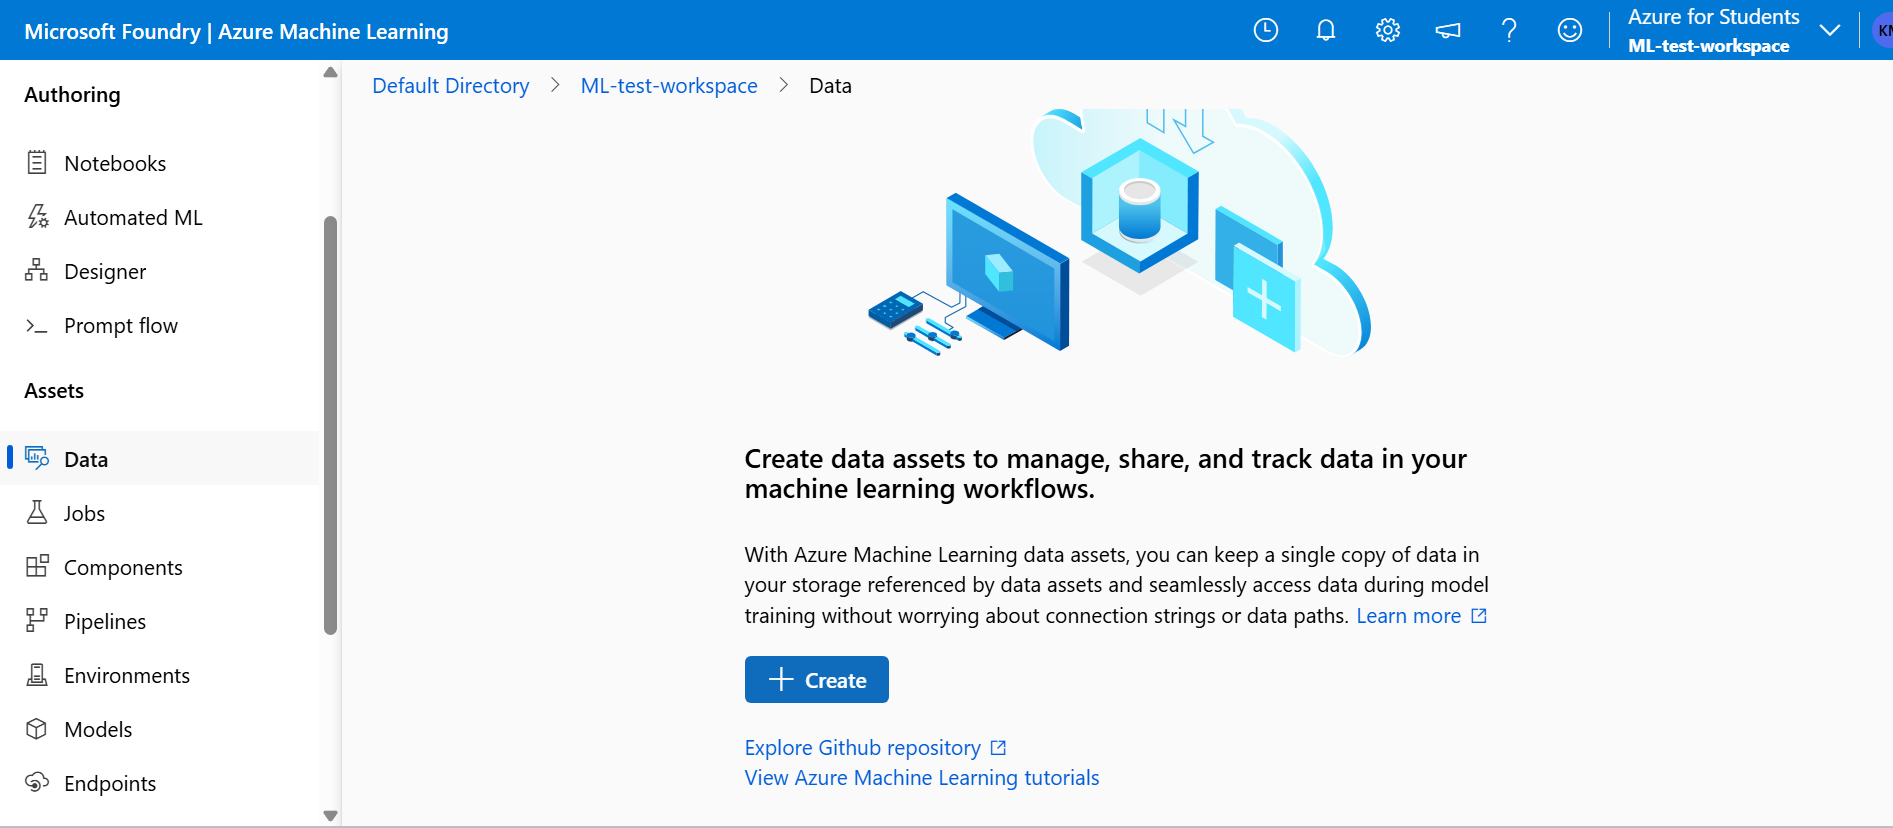
- Download a sample dataset (daily-bike-share.csv) from Citation(Azure Course)
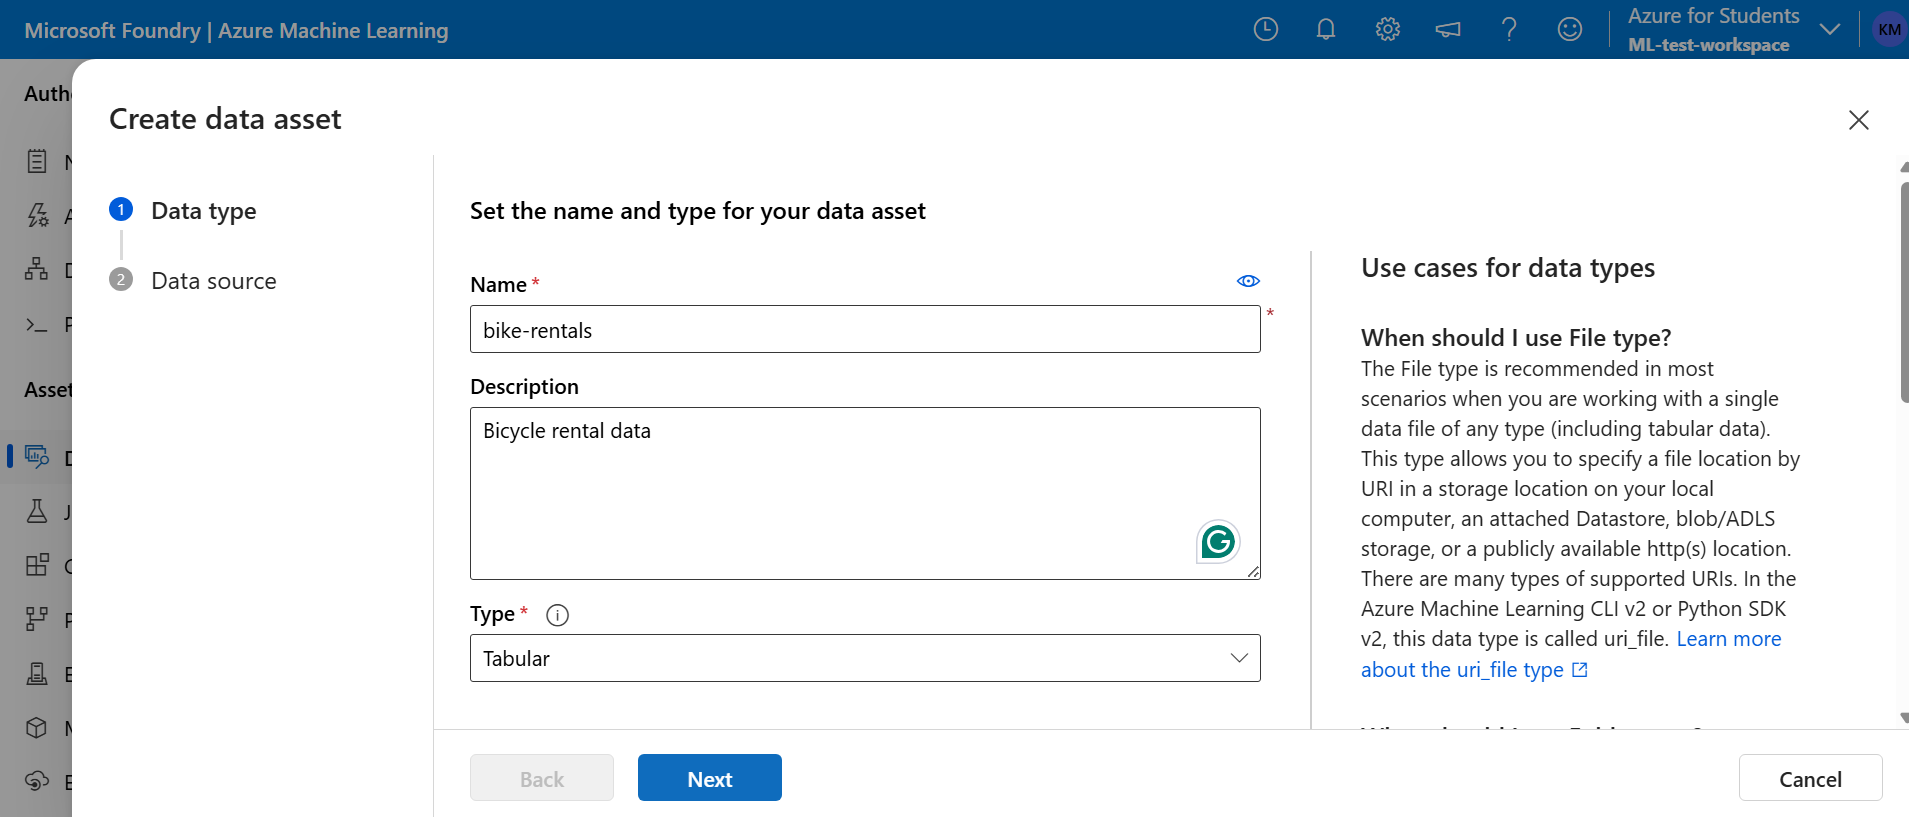
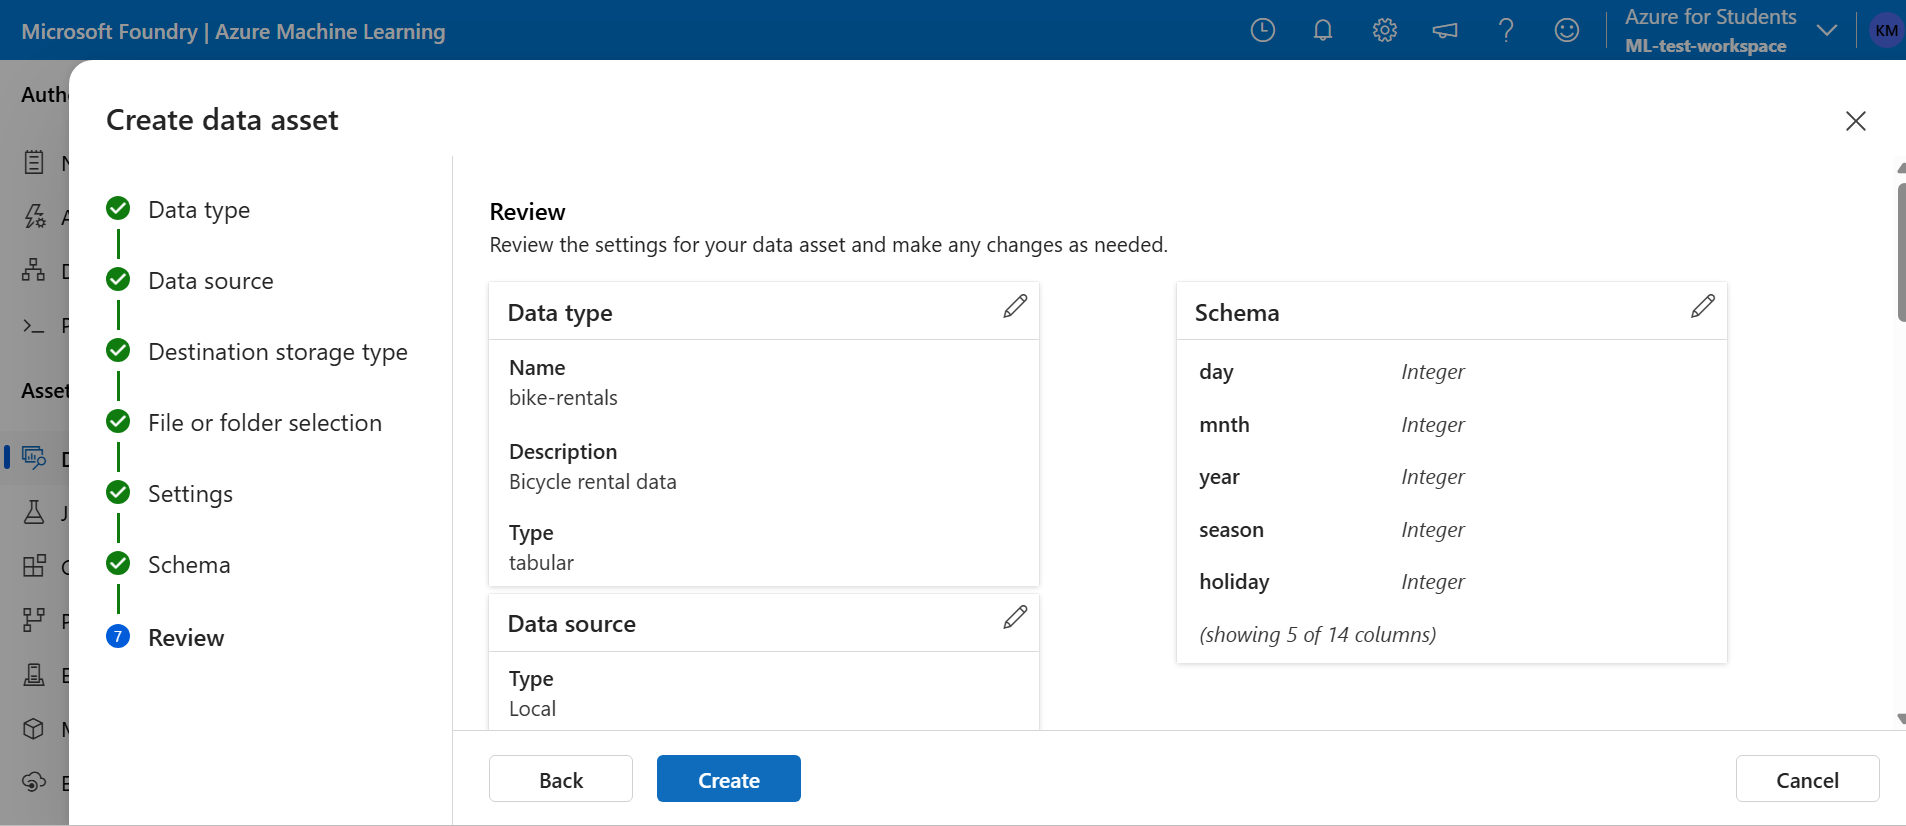
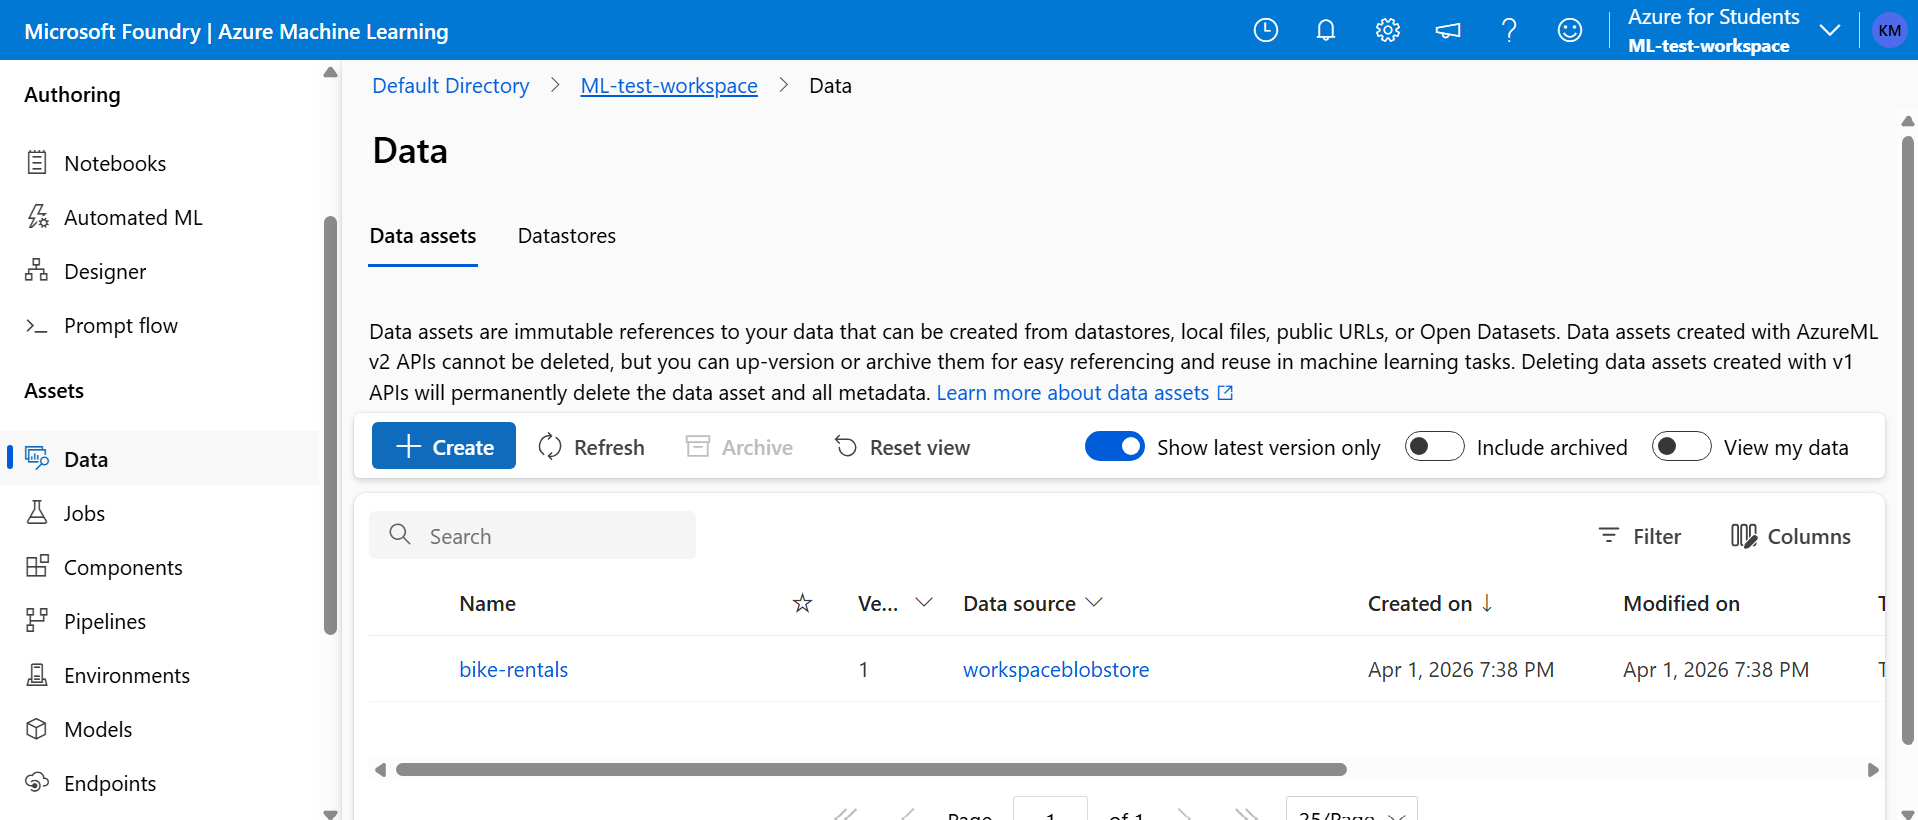
- Create a new dataset from local files, using folloaing setting to configue:
Basic Info:
- Name: bike-rental
- Dataset type: Tabular
- Description: Bicycle Rental data
- Delimiter: Comma
- Encoding: UTF-8
- Headers: First row
Datastore and fill selection:
- Select or create a datastore: Currently selected datastore
- Select files for your dataset: Browse to the your dataset (here we have the daily-bike-share.csv file)
- Upload Path: leave default selection
- Skip data validation: not selected
Settings and preview:
- File format: Delimited
- Delimiter: Comma
- Encoding: UTF-8
- Column headers:Only first file has headers
- Skip Rows: None
Schema:
- Include all collumns other that path
- Review the automatically detected types
Confirm details:
- Do not profile the dataset after creation
- Validate schema.
Step 4: Train a Machine Learning Model
Azure ML includes Automated Machine Learning (AutoML), which uses scalable cloud compute to run multiple preprocessing approaches and training algorithms in parallel, then identifies the best-performing supervised model for your dataset. AutoML focuses on supervised learning scenarios, where the training data contains known target labels.
AutoML Capabilities
| Capability |
|---|
| End-to-end machine learning lifecycle |
| Data preparation |
| Model training |
| Deployment |
| Monitoring |
| Low-code tools (Designer) and full-code workflows |
Supported Tasks
- Classification
- Regression
- Time-series forecasting
Step 4-1: Create a New Automated ML Job
Creating a new AutoML job defines the scope of your machine learning experiment. In the updated Azure ML interface, “experiments” are now referred to as “jobs.” This job will control the entire pipeline, including training multiple models, evaluating them, and selecting the best one.
Steps:
This step defines the core learning task and how the model will interpret the data. You specify that the problem is a regression task, meaning the model will predict continuous numeric values. Azure ML will automatically analyze the dataset and prepare it for training. The dataset is the foundation of your machine learning model. You either choose an existing dataset or upload a new one. Azure ML automatically detects the schema and data types. You must also define the target column, which is the value the model will learn to predict. Also, machine learning training requires computational resources. Azure ML uses compute clusters to run training jobs efficiently. You can either select an existing cluster or create a new one. Proper configuration helps balance performance and cost.
Step 4-2: Additional Settings (Advanced)
This section allows you to control how AutoML performs training and evaluation. You can define metrics, validation strategies, algorithm selection, and runtime constraints. These configurations help optimize both model performance and training efficiency.
Metrics:
The evaluation metric determines how models are compared during training. For regression tasks, NRMSE is commonly used because it normalizes error relative to the dataset scale.
- Primary metric:
NormalizedRootMeanSquaredError (NRMSE) - Alternative:
RMSE/MAE
Validation:
Validation ensures that the model generalizes well to unseen data. Cross-validation is especially useful for smaller datasets, as it evaluates the model across multiple splits.
- Validation type: Auto or K-fold cross-validation
- Folds:
5(recommended)
Featurization
Featurization transforms raw data into a format suitable for machine learning. Azure ML automatically handles preprocessing tasks such as encoding, scaling, and missing value handling.
- Featurization: Auto (Enabled)
Algorithms
AutoML can test multiple algorithms to find the best model. You can allow all algorithms or restrict the search to specific ones to reduce training time.
- Allowed algorithms:
RandomForestLightGBMXGBoost(optional)- Mode: Allow all (default) or restrict
Limits
Training limits prevent excessive compute usage and help control cost. Early stopping ensures inefficient models are terminated early.
- Max training time:
15–30 minutes - Max concurrent iterations:
2–4 - Early stopping: Enabled
Step 4-3: Submit the Job
After configuring all settings, you submit the job to start the training process. Azure ML will automatically run multiple experiments in parallel, testing different models and configurations.
- Action: Click Submit / Finish
- Mode: Automated execution
Step 4-4: Monitor Training
During training, Azure ML provides real-time monitoring of all model runs. You can track performance metrics, compare models, and observe progress through the dashboard.
- Navigate to: Jobs → Your AutoML job
- Monitor:
- Model iterations
- Metrics
- Compute usage
Evaluate, Explain and Develop the Best Model
Once training is complete, Azure ML highlights the best-performing model based on the selected metric. You can analyze detailed metrics and visualizations to understand model performance.
- Metrics:
RMSENRMSEMAE
- Charts:
- Predicted vs True
- Residuals
Explainability helps you understand how features influence predictions. Azure ML provides both global and local explanations, which are essential for trust, debugging, and compliance.
- Tab: Explainability / Interpretability
- Views:
- Global feature importance
- Local explanations
After selecting the best model, you can deploy it as a web service to make predictions in real time or batch mode. This step enables integration with applications via APIs.
- Deployment type:
- Real-time endpoint
- Batch endpoint
- Compute:
- Managed endpoint / ACI / AKS
- Output: REST API endpoint
Step 5: Deploy Model as a Service
In this section, you will learn how to deploy your trained machine learning model as a web service using Azure Machine Learning. Deployment makes your model accessible to other applications or users via a REST API, enabling real-time or batch predictions. Azure ML supports both testing and production deployment options, so you can choose the best fit for your use case.
Deployment Options
| Option | Use Case |
|---|---|
| Azure Container Instance (ACI) | Testing |
| Azure Kubernetes Service (AKS) | Production |
Deployment Configuration
- Service name: predict-rentals
- Compute: ACI
- Authentication: Enabled
Output
After deployment, you get:
- REST endpoint
- API key
Step 6: Test the Model
Example Code
1
2
3
4
5
6
7
8
9
10
11
12
13
14
15
16
17
18
19
20
21
endpoint = "YOUR_ENDPOINT"
key = "YOUR_KEY"

import json
import requests

x = [[...]]  # input data

input_json = json.dumps({"data": x})

headers = {
    "Content-Type": "application/json",
    "Authorization": "Bearer " + key
}

response = requests.post(endpoint, input_json, headers=headers)

if response.status_code == 200:
    y = json.loads(response.json())
    for i in range(len(x)):
        print(f"Day {i+1}: {round(y['result'][i])}")